
Are you looking to create WooCommerce website from scratch? Of course, it’s a brilliant idea. But you need to take few things into consideration before starting your WooCommerce website. You need to follow a step by step process to create an e-commerce website. Therefore, you should have the basic knowledge to initiate the online business in a professional manner.
If you are not a tech-savvy user and searching for easy steps to create WooCommerce website from scratch, then you have landed at the right place. WooCommerce is the world’s most popular platform for e-commerce because it is easy-to-use, cost-effective, based on some mind-blowing marketing principle, and a fantastic option for a beginner. However, a lot of beginners are not comfortable to set up the WooCommerce website on their own. They struggle to find the correct approach to create WooCommerce website from scratch.
Therefore, in this tutorial, we’ll guide you thoroughly on how to create WooCommerce website from scratch, and alongside the setup, we’ll share some tips and ideas, so you grow like a pro.
Then what are you waiting for? Let’s begin.
What is WooCommerce?
WooCommerce is an all-in-one free WordPress plugin package that allows you to boost your sales by selling online products and services. WooCommerce brings a seamless flow in your business, making the online store management quite simple and easy to use.
It is one of the best e-commerce WordPress plugin launched in 2011. It provides powerful and useful features that help you handle your shipping, payments, and tax-related tasks easily. The best thing is, it’s completely free as it is a open-source platform and you don’t need to spend anything to use WooCommerce.
It’s a robust e-commerce website builder where you get pre-installed functionalities to launch an online store pretty quickly.
Even though you have an existing website, you can still install the WooCommerce plugin in your WordPress panel. WooCommerce plugin provides many benefits that ensure your business’s scalability on a large scale.
WooCommerce has no licensing fees, therefore, you are free to create multiple online stores or websites. As it is built on top of WordPress, you automatically get to use all the superb WordPress features too. You will find tons of ready-to-use WooCommerce templates and designs to create WooCommerce website from scratch. You can customize the designs as per your requirements or use the free ones.
WooCommerce is used by most businesses because it is very flexible. It supports all major add-ons or plugins for additional functionality such as subscriptions, bookings, memberships, social media login, shipping integrations, and more. You can also use features like data backup, contact forms, security firewalls, call now buttons, etc. WooCommerce is compatible with all major payment gateways and services. PayPal is the default payment option set up in WooCommerce and you can add more as per your requirements.
Before you start your WooCommerce store, you need to have a domain name and WordPress hosting. So follow the step by step instructions stated below to create WooCommerce website.
Important Things to Create WooCommerce Website
Since WooCommerce is a WordPress Plugin, so here you’ll need to add a few items in your checklist, such as-
- A clear and attractive domain name.
- A WordPress hosting to store your entire website.
- An SSL certification, for a secure mode of payment.
Domain name, web hosting, and SSL certificate are not for free and you need to purchase them. Also, it will take most of your time for the perfect setup to create WooCommerce website from scratch. For example, it’ll be like a physical store in which the “domain” will be describing your business with a name, “hosting” will be placed to establish that business, and “SSL certificate” will be the ‘secure mode of transaction’; the same as you get in general stores.
Since these are the foundational steps to establish a successful online store, so make sure you consider these essential things as the top priority. Use these steps to create WooCommerce website from scratch.
Choosing a Domain Name
The first rule of thumb is “domain name should be easy to remember“. If you’re working on a specific niche, then choose your domain with the related keyword. For example, “Toycart” clearly defining the intent. On the other hand, if you’re working on multiple products, then go with a single but attractive short word like big brands use such as “Amazon” or “Walmart”.
Don’t blindly go for domain registrars providing a domain address at cheap rates. Remember, a domain providing company can easily play hoax games with you. It’s possible if they are providing domain name at a very low price, then possible that the domain name was removed by ‘Google’ or there are any issues with it because someone has already used it.
That’s why if you’re planning to register a domain name, then buy it from trusted providers. You can buy the domain name from the best domain registrars mentioned below:
- GoDaddy.com
- Namecheap.com
- Bluehost.com
- HostGator.com
- Domain.com
We recommend using “GoDaddy” where not only you’ll find a reliable domain for your online business, but along with that you also get 24×7 customer support. Since they are the biggest domain registrars in the world with 19 million users, you’ll have no trust issues with them.
Simply visit GoDaddy.com
You’ll see the home page interface like the below image.
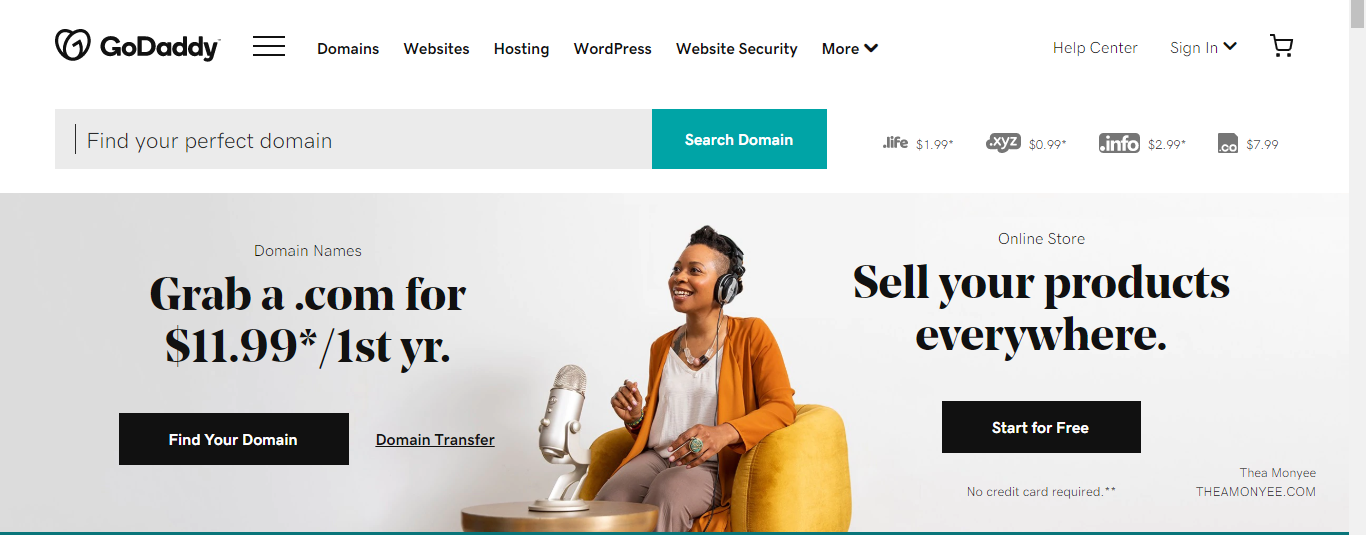
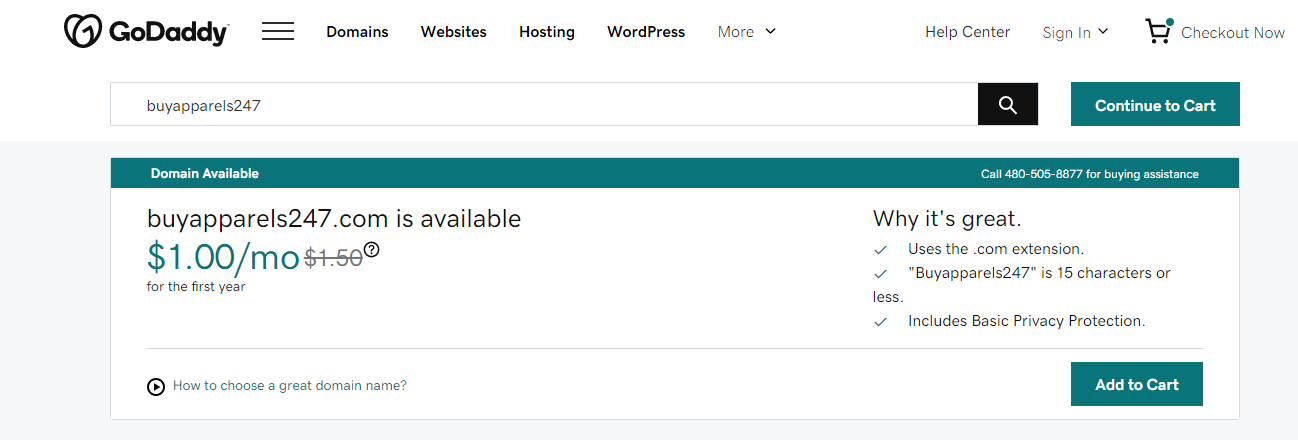
In the top section, you get a search bar to find the domain name. Write some keywords or enter any word you want as your domain and hit the “Search Domain” button.
Now you’ll see a list of domains at different prices. You can also get some cheap ones such as “.Net, .ORG, .info,” but if you want to build a professional-looking website, these domains don’t make sense. Choose “.COM” if you’re targeting both local and international users on your online store.
Also, never try to choose a domain name on an existing brand name.
For example- don’t select “amazon.net, amazon.org, or amazingamazon.com”. The company can file a case against you because you’ll be stealing their brand loyalty. So, always chose your unique brand name.
Once you’ve selected your domain, click on the “Add to Cart” option.
You can get a domain at a discounted price if you’re buying a long-term domain plan of 2 years or more. Otherwise, book it for a year (Don’t worry, you can always renew it when the expiration date is nearer). You will also get email notifications 30 days before the domain is going to expire. So, you can easily renew it without any issues.
(Note: You’ll have to register domain minimum for 1 year)
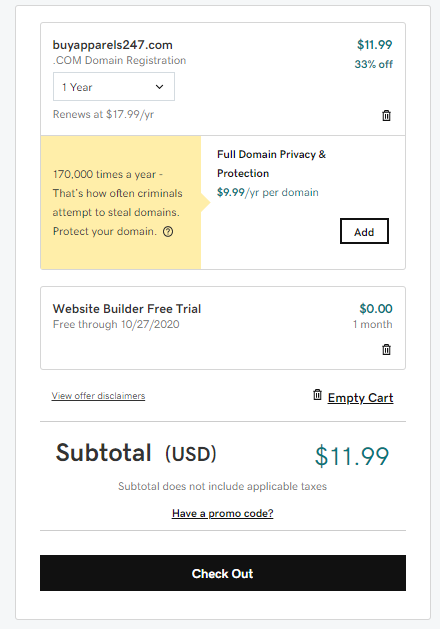
After checking all the details, now you’ll see the domain package available in your cart. Here, click on the “Check Out” button to proceed.
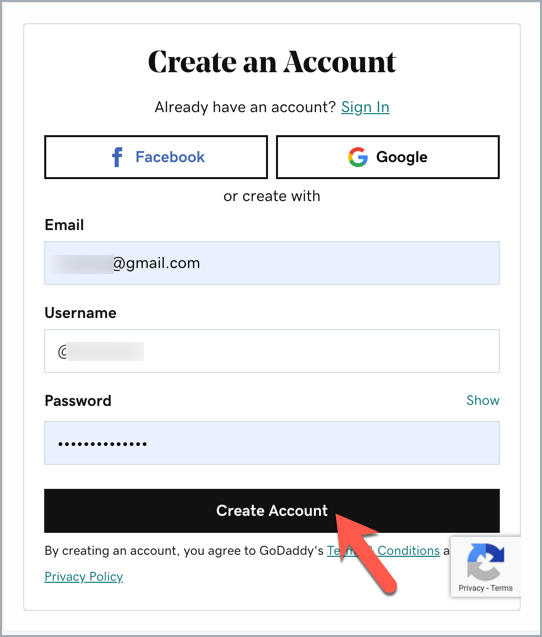
After doing this, you’ll need to “Sign up if you haven’t done it.”
So either fill the “sign up” details or continue with Google or Facebook. (If you already have an account on Google, you can use the same).
In the last step, you’ll be redirected to the payment gateway. Enter complete billing information, and choose from the payment options provided by GoDaddy.
You’re free to use your debit card, credit card, or PayPal alongside other cards as well.
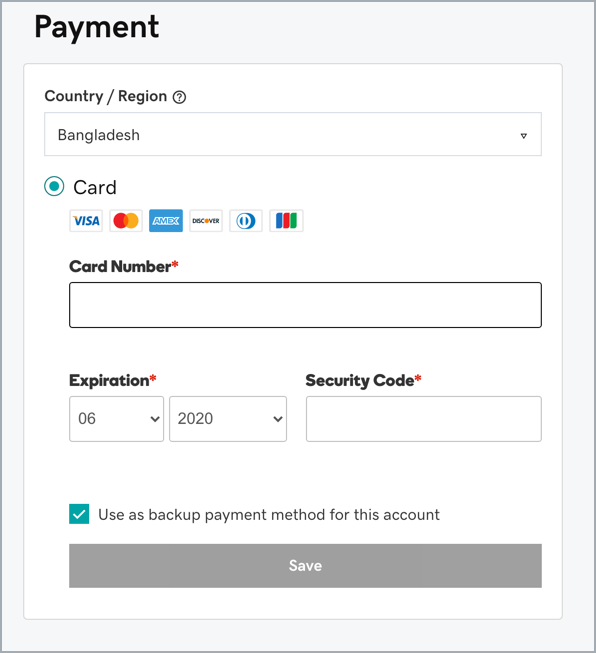
Hit the save button, and the transaction will start processing automatically. That’s it! You’ve got your domain name, and now you’re ready to proceed for the next step.
Choosing ‘Hosting’ for WooCommerce store
Now, here comes the most important step, even more important than registering a domain. Because your hosting company will decide how well your website will perform in terms of speed. That’s why it becomes essential to choose the best web hosting for your WooCommerce store.
You need to consider few pointers before choosing the web hosting. It should have the best speed, reliability, and ample storage. However, when it comes to launching an online WooCommerce store, you should choose only WooCommerce specialized web hosting.
In this case, the WooCommerce official site also helps you out. You can easily search for the trusted partners of WooCommerce, and choose from the following.
But if you’re just a beginner, then we’ll also recommend you to go with “Hosting for New stores”. Here you will see few hosting providers names having good reputation in the internet world, such as the below ones:

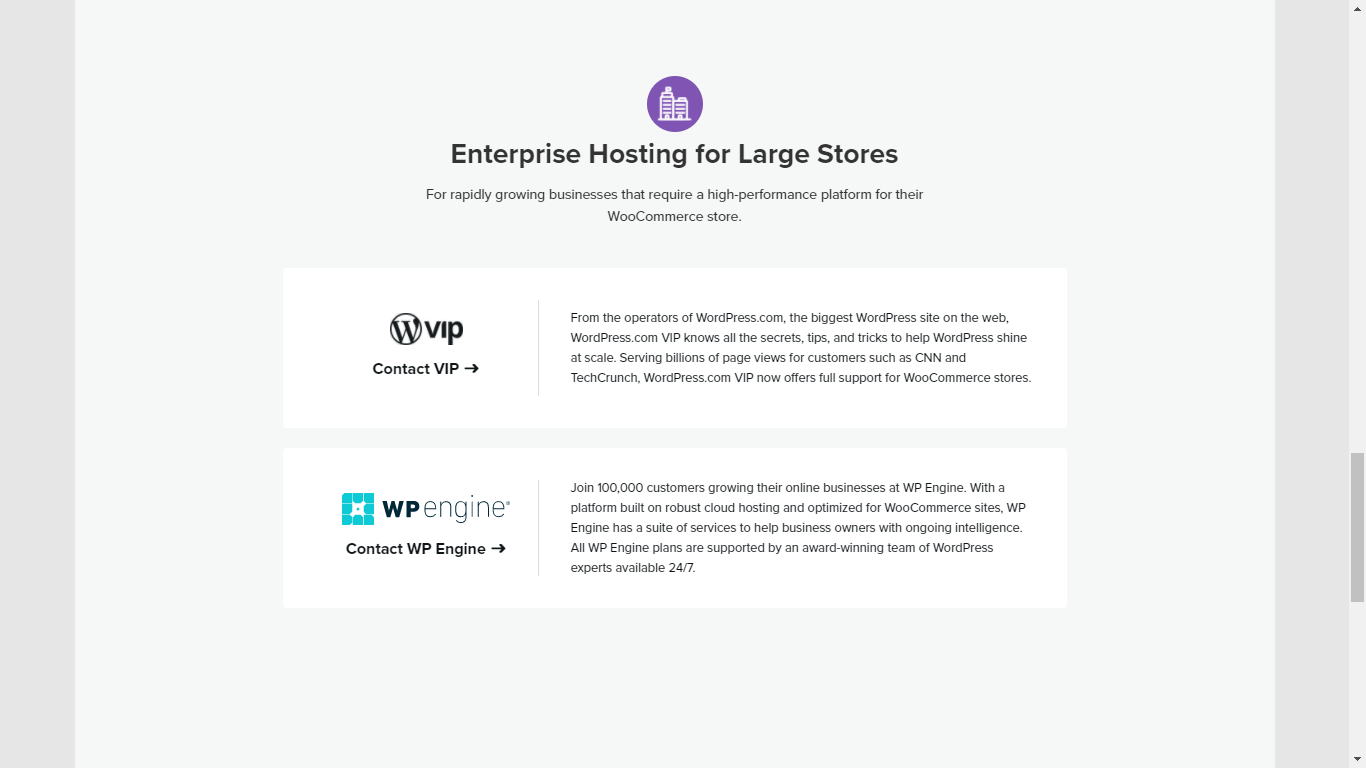
If you already have a source to bring massive traffic to your online store, then you can choose the option of “Hosting for Growing Stores”.
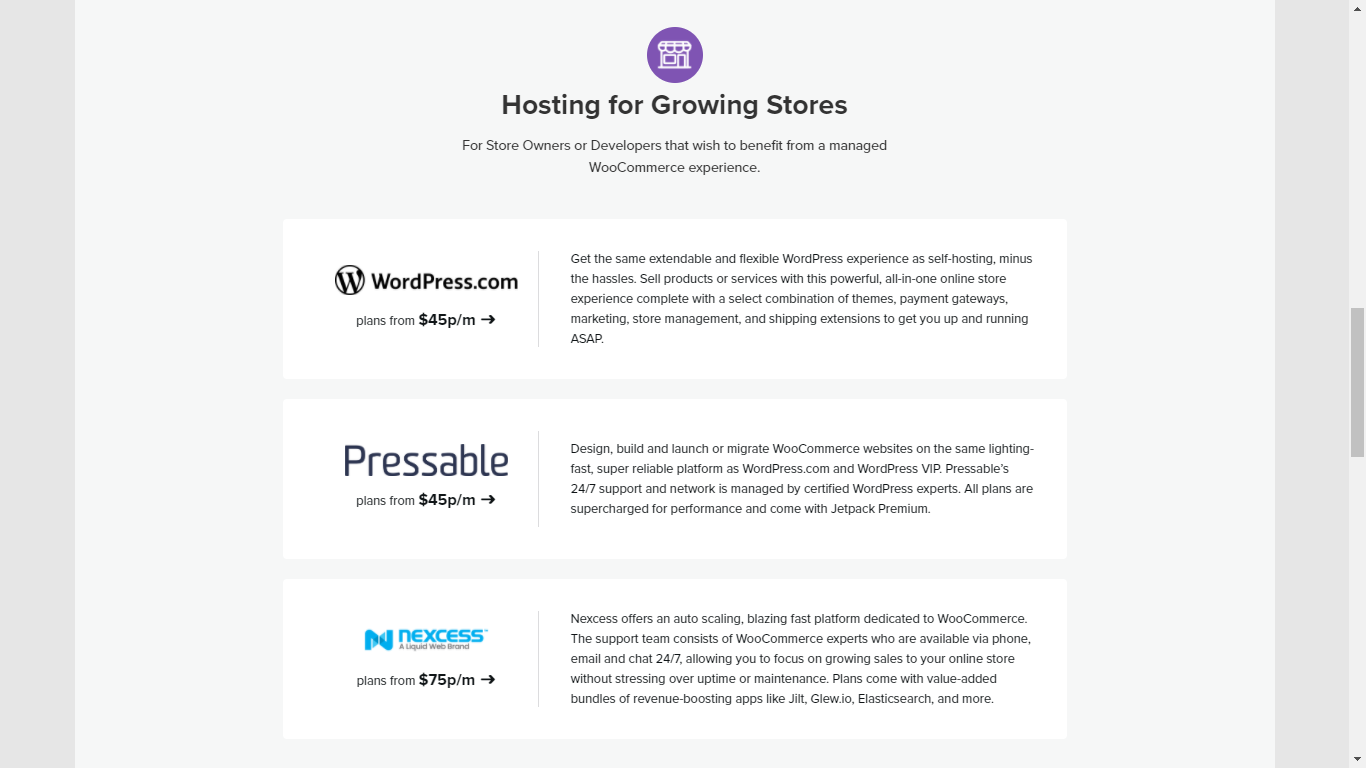
This option is perhaps useless if you’re a beginner. It is only for those enterprises or big companies who understand business strategies. If you are confident about the brand, which can bring millions of views monthly, you can opt for this plan.
But, if you’re short of budget and seek the best web hosting, then you can go with “Bluehost” hosting service otherwise “Siteground” is recognized as the best hosting provider.
How to Purchase Bluehost Hosting?
In this tutorial, now you’ll learn how to purchase Bluehost hosting to create a WooCommerce website from scratch. You should choose Bluehost because it’s an affordable option, and on top of that, you can also book a domain name for one year absolutely free.
Yes, you heard it right. Bluehost allows first time users to book a domain for one year, absolutely free! Therefore, if you want to save your money, you can also choose this option ‘offered by Bluehost‘. In addition to this special gift, you would be amazed to know that even wordpress.org recommends using Bluehost.
And this covers everything you need to start a WooCommerce store confidently.
Simply start by going to the official Bluehost website.
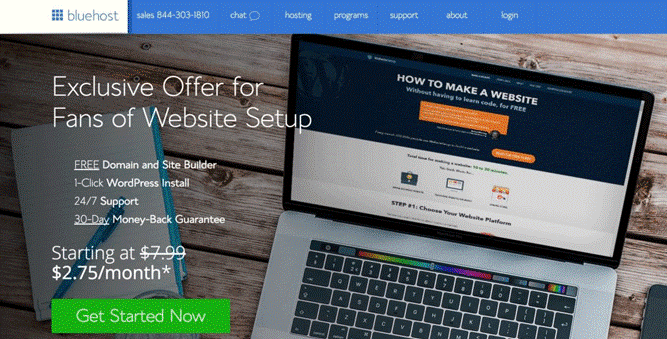
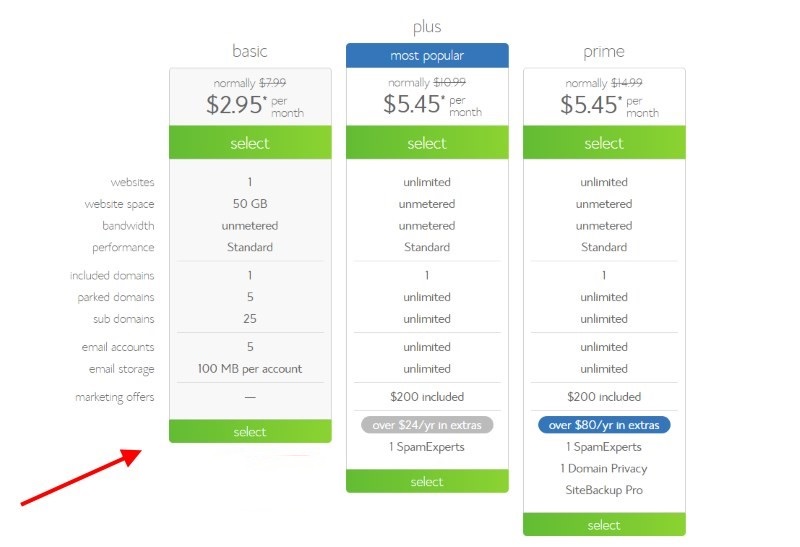
A window will pop-up like the above one. Click on the “Get Started Now” button, and you’ll be redirected to a page where you’ll be asked to select from three options.
Select from Basic, Plus, and Prime, each with varying rates, so choose the plan that seems a great deal to you. If you’re a beginner, then there’s nothing wrong with purchasing the Basic plan.
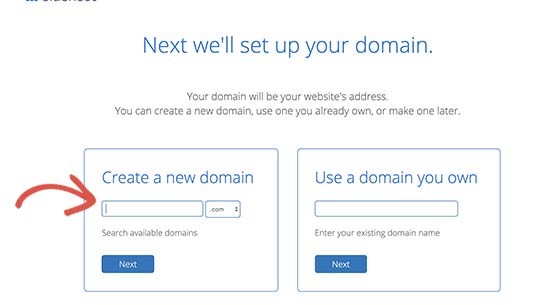
In the next step, you’ll be linking your Domain with Bluehost.
Enter your existing domain if you’ve already purchased one from “GoDaddy” or simply choose a new domain name by creating a new domain option provided by Bluehost.
Now, it’s the time to complete the buying process. Once you purchase the domain or add your existing domain on Bluehost, you will be automatically redirected to the payment gateway.
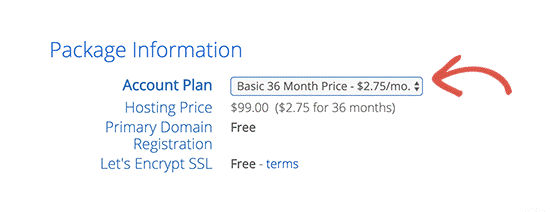
Again, Bluehost provides you with the option to choose “Account Plan” and it’ll be best if you choose a 36-month plan that comes at a discounted price. It’s the best part about Bluehost that it always brings new offers from time to time.
However, you can also choose shorter terms, but they’ll come at a high price. It may not be a good option if you consider it from a new user’s perspective.
Now, some additional options might be confusing you, but they are not important if you’re just a beginner. This is because you’ll be only raising the total cost by adding them. Of course, you can add them if you feel they are valuable for your business needs.
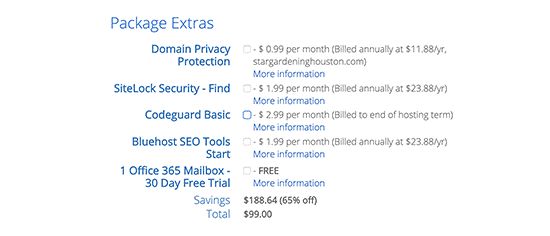
Let’s take a quick look at the benefits.
Benefits You Receive on Choosing Bluehost to Create WooCommerce Website
- Just as a reputable company should provide, Bluehost provides 24/7 customer service through live chat. They offer you unmetered bandwidth and five email accounts.
- They offer free domain and free SSL certificates to ensure improved security for your WooCommerce store. At a minimal price that starts from $2.74/month, your website becomes completely secured.
- If we talk about significant SEO benefits, you can’t overlook Bluehost’s promise that offers you 99.99% uptime guarantee. You will also get an unbeatable loading time of 0.4 seconds (404ms).
- However, not just Bluehost, you should always consider buying only those hosting services which offers an excellent uptime. This is because if your site is not running 24/7, your customers will switch to your competitors.
- Few hosting services offer 95% uptime which is fairly good but slightly below the average. So, go for Bluehost and comfortably get the benefits of 99.99% uptime. Higher uptime indicates that your store is highly operational and running consistently without any issues It’s often counted in percentage. Similarly, if you want your website to always stay active and give the best performance, then go with Bluehost.
- Bluehost automatically installs SSL certification on your website. SSL provides complete payment protection on a site and customers always prefer sites having a SSL certification. In fact, majority of the websites worldwide are using SSL certificates. You can check SSL certificate is enabled or not by checking your website’s URL. It will start with https:// and not http://
[button color=”undefined” hover_text_color_override=”undefined” url=”https://www.bluehost.com/track/shopitpress/woo-scratch” text=”Get hosting for your WooCommerce store” color_override=””]
How to Set up WooCommerce in WordPress?
Nowadays, companies are striving more to bring easiness in the process of setting up a WordPress website. That’s the reason why Bluehost provides you with a single-click facility to install WordPress automatically. However, in other cheap hosting companies, you don’t get this option, but Bluehost provides this feature.
Once you are done with purchasing the hosting, simply log in and go to your hosting dashboard. Here right-click on the “Login into WordPress” option.
The shortcut will automatically redirect you to the WordPress dashboard. Now you can start handling your entire online business operations from here.
Your WordPress dashboard will look like the below image. But you’ll have to set up a few basic settings first before you fully start using WordPress.
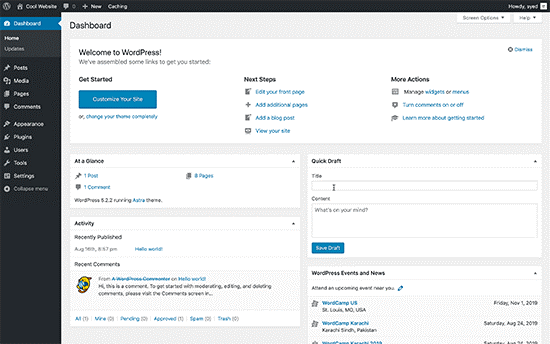
Therefore, go to the WordPress admin area in the Setting menu. Here two options have been provided. One is Site Title, to give a clear idea about your WooCommerce store to your customers.
The second is Tagline to attract your users towards your online store. Here, you can write relevant tagline that attracts your buyer’s attention. If you have nothing in mind, then you can leave these options for now. You can always come back later and set these options.
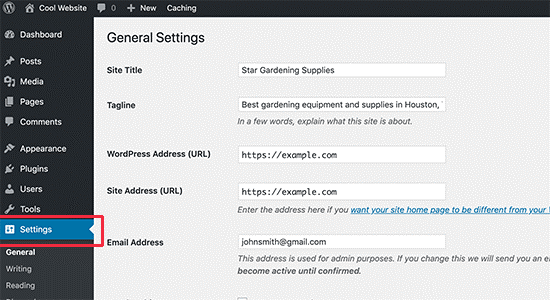
Enter the email address and make sure that you provide a valid email address. This is because this email address will be used by WooCommerce as the point of contact to stay in touch with you. You will get all the notifications and user passwords on this email address only.
Also, don’t forget to select the timezone settings as it provides a clear insight to ‘Google’ while indexing your website.
Review everything once again. Once you are satisfied with the settings, click on the “Save Changes” option. Now head to the next steps where you’ll be installing the WooCommerce plugin.
WooCommerce Store Installation Setup: Step by Step Process
As mentioned earlier, WooCommerce is a WordPress Plugin. So its very easy to install and activate it.
The simple to use features and mind-blowing pre-installed features make WooCommerce one of the most used plugins worldwide. After following some necessary steps, you can quickly establish a fully functional, visually appealing, and secure online store.
Here, we’ll provide you with a detailed tutorial on how to set up a WooCommerce Website, from start to end.
Step 1: Install and activate WooCommerce Plugin
It’s a simple step, just like you install the other plugins in WordPress.
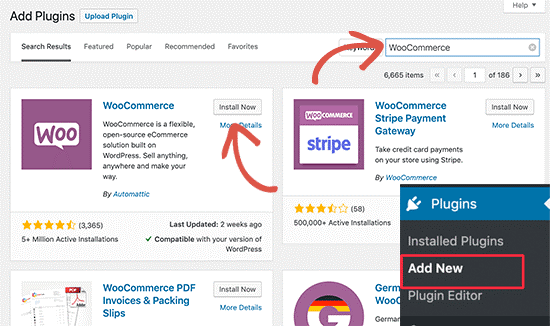
Simply go to the Plugin Option in the WordPress dashboard, and choose the “Add Plugins” option.
On the right side of the page, you will find the search bar. Enter “WooCommerce” in the search bar. Immediately, you’ll get the WooCommerce Plugin with the official logo as the first search result.
Click on “Install Now” button. This will start the installation process automatically. Wait till the installation is complete.
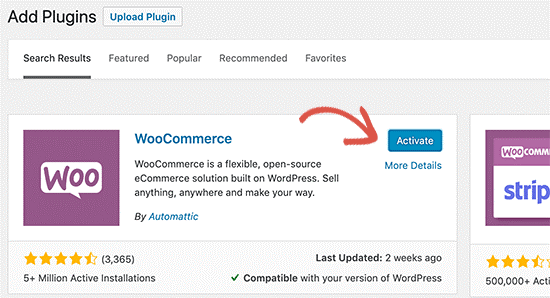
Now you need to activate the plugin.
However, in most instances, beginners forget to activate the plugin. Simply visit, “Installed Plugin” section and activate the WooCommerce Plugin by clicking on the “Activate” option.
Step 2: Set up Wizard in WooCommerce Plugin (Store Setup)
Right after WooCommerce plugin activation, you need to launch the Setup Wizard for WooCommerce. In a nutshell, you can understand it with the help of an example. After deciding your business and selecting a place (in terms of hosting) for your online store, now you’ll be setting up the products.
And not only products but currency, store location, and much more. With a few simple steps, you’ll see your WooCommerce store up and running. Don’t worry, if you want to change settings, you can do it later.
But make sure that you attentively fill all the information. This is important because it will have the entire basic details that describes your store.
So select the location where your store is located, fill out the address, the city, and postcode/zip code. Choose the relevant option for the fields “What type of currency do you use?” and “What kind of product do you plan to sell?”.
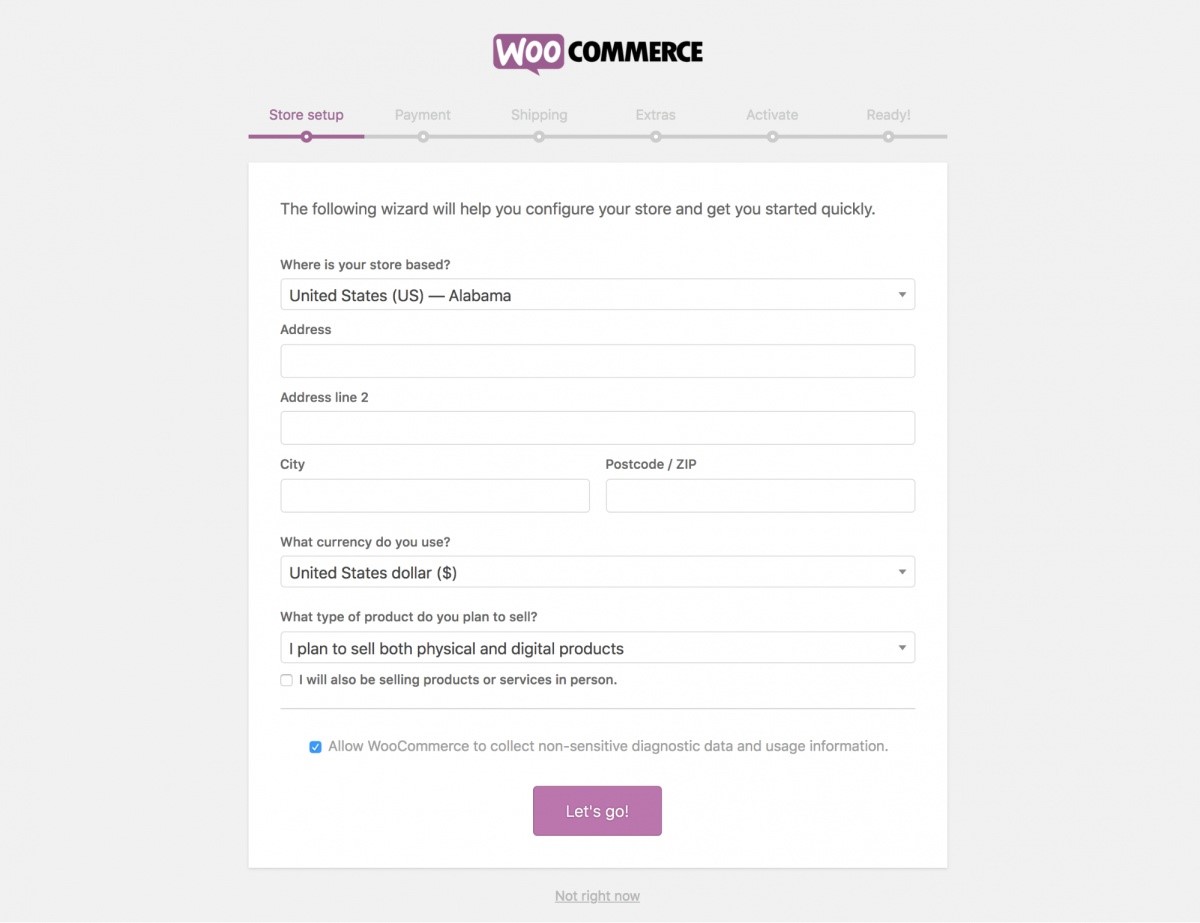
However, you can also use the Currency Converter Widget if you want to display multiple currencies in your store. This is because by default, you can use only one currency type at a time in WooCommerce. Again, check out every option, fill the necessary details, and click on the “Let’s go” option.
Step 3: Set up Wizard in WooCommerce Plugin (Payment)
In the Setup Wizard, choose the Payment option for accepting online payments. Using the payment option specified in this step, the buyer will pay you for every product on your online store. Choose payment mode from the three options stated below.
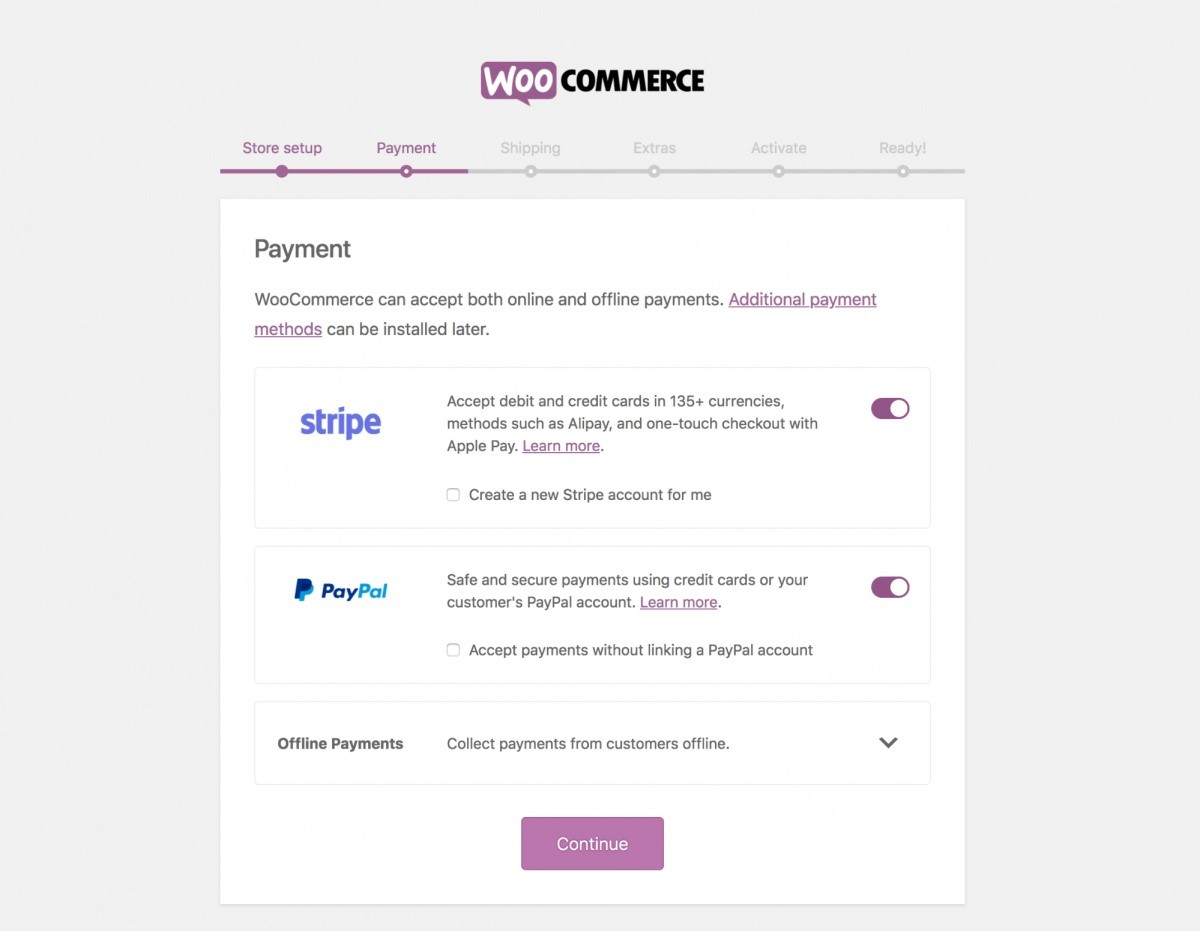
Based on your location, you can choose offline payment mode, otherwise enable PayPal and Stripe option. Later, you can also take the help of extensions and change payment settings.
If we talk about the offline payment option thoroughly, you get the option to accept cheque payments, Bank Transfer (BACS), and Cash on delivery. You can also let the wizard create a simple gateway for fast and secure transaction.
Click on the “Continue” button and proceed to the next page after choosing the right payment option for your WooCommerce store.
Step 4: Set up Wizard in WooCommerce Plugin (Configure shipping settings)
In the next step, you will provide the shipping information. The shipping charges depends upon the location from where you are running your WooCommerce store. If your store is located in the United States, you can use the Live Rates that shows the exact shipping price to be charged for order fulfillment.
Similarly, if you want to provide free shipping to your customers. For different zones, you’ll be deciding whether to provide flat shipping or free shipping.
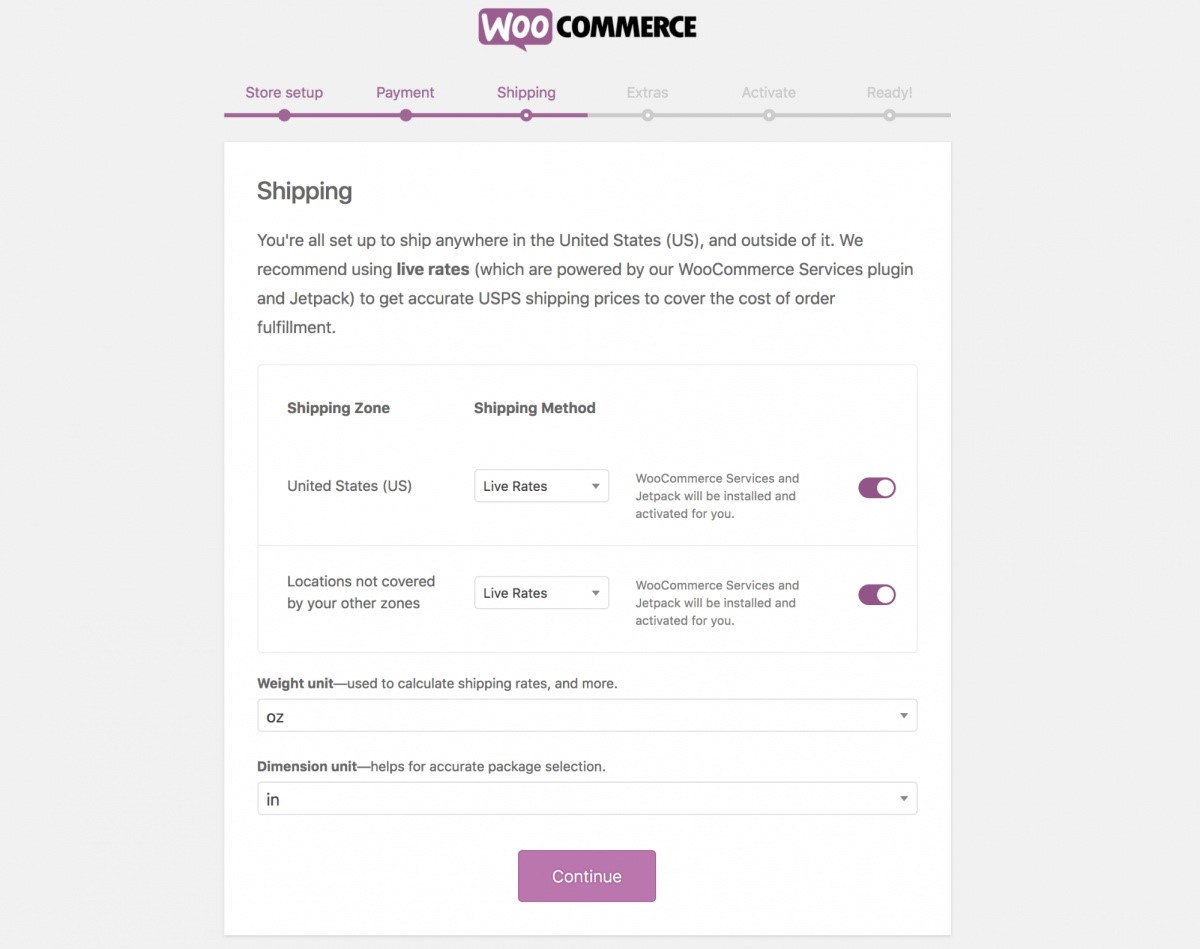
You can also decide the weight unit or dimension unit to calculate the shipping rate. After setting up the complete information, click the “Continue” button.
Step 5: Set up Wizard in WooCommerce Plugin (Recommended Extra)
In this step, WooCommerce provides you with some extra options that add value to your online store. Here you mainly get two different choices, the first is the Storefront theme, and the second is Automated Taxes.
WooCommerce recommends you to install the Storefront theme because cheap or free themes aren’t well-optimized to ensure the smooth functioning of a woocommerce website. That’s why you should definitely install the Storefront theme. Indeed, it’s an official theme recommended by WooCommerce.
Another option is provided to calculate automatic tax rates that reduce manual calculation. But it also depends on two things, ‘your business type’ and ‘your location.’
However, if you aren’t well familiar with tax-related matters, then skip this step for now and consult a tax professional. He will be able to guide you better on how to decide tax for a particular product for your online business.
Click the “Continue” button and move to the next step.
Step 6: Set up Wizard in WooCommerce Plugin (Connecting store to Jetpack)
In this step, you’ll be connecting your WooCommerce Store to the Jetpack plugin. It’s a useful plugin that provides some additional services to support your website like discounted shipping labels and live rates.
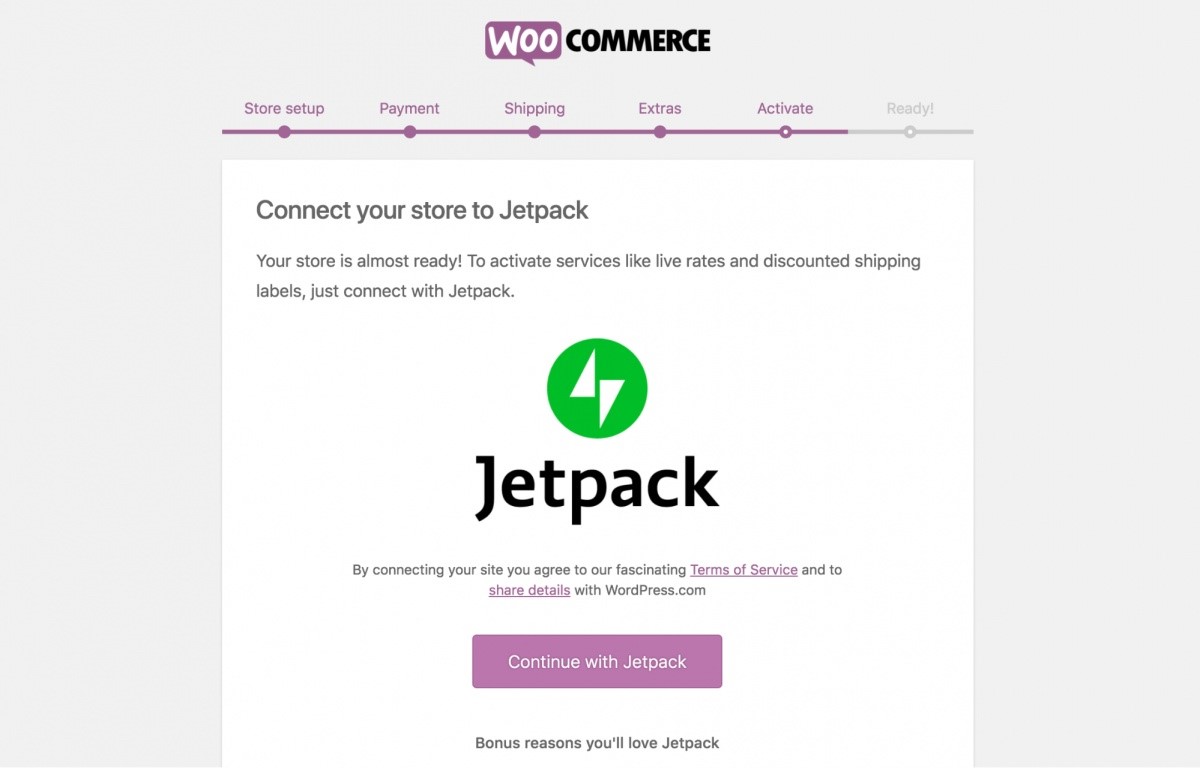
However, you can also skip this step if you don’t want to use the Jetpack Plugin or haven’t installed it. After this step, finally, your store is complete and ready to launch.
Step 7: Adding products to WooCommerce
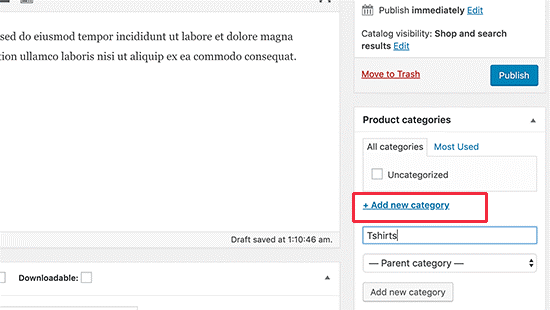
Once you successfully set up the WooCommerce Wizard, you get a “Products” option in the dashboard section. Below that section, you find the “Add New” option, so click on it and simply add your first product. Give a title to your product and add a comprehensive description.
Now, move to the “Add New Category” in the Product categories section on the right side of the page. In this way, you’ll be categorizing your product so that your customers can search the product easily with the help of categories.
Once you’ve created different categories for the products you are selling on your WooCommerce store, you will find a section like the below one.
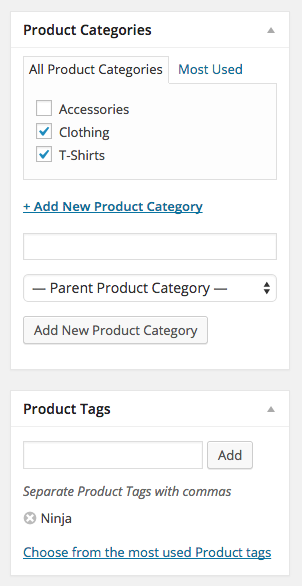
Again, whenever you add the product of the same category, simply tick the checkbox on the category option. Your products will be categorized immediately in the respective category.
Any website can easily appear dull or boring if there are no featured images. Especially if you’re opening an e-commerce website, you can’t skip this step. But don’t worry, it isn’t that difficult task. On the same right side menu, you get the option to add product images. In the product gallery menu, you can add multiple images to show the different ‘variations of the product.’
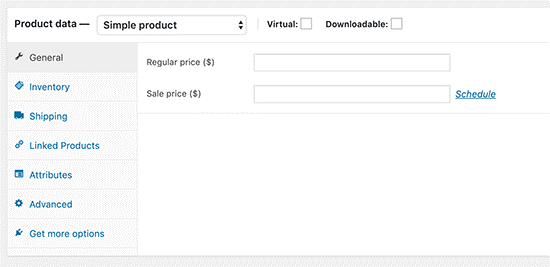
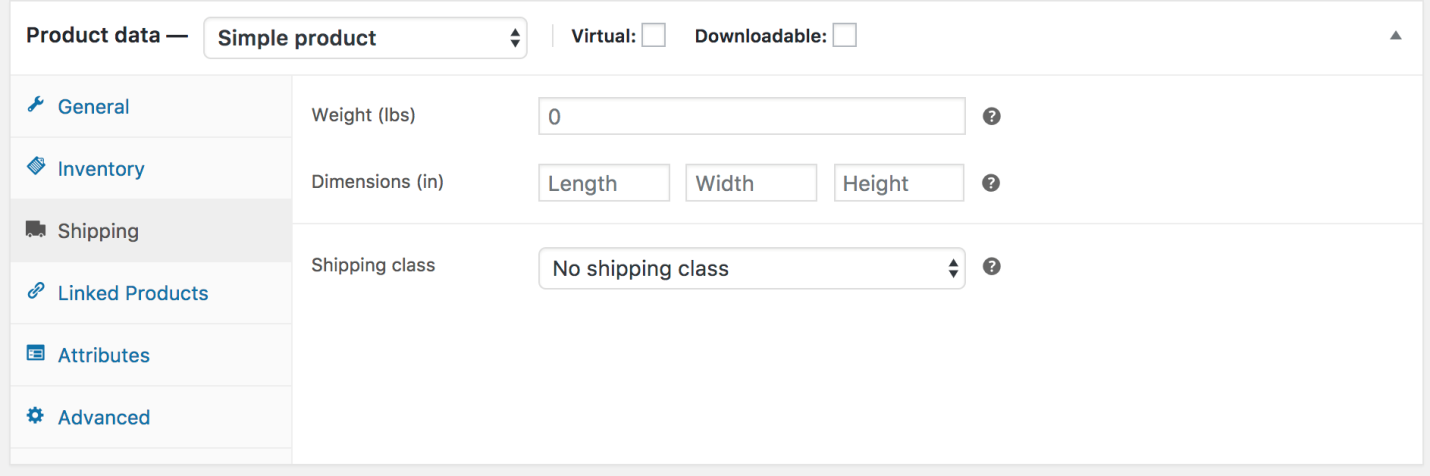
Scroll down and find the Product Data Box. Here you will choose the product pricing, product type, shipping, and other related information.
In the “inventory section,” don’t forget to Enable the Stock Management option. Otherwise, you’ll have to update the stock status manually.
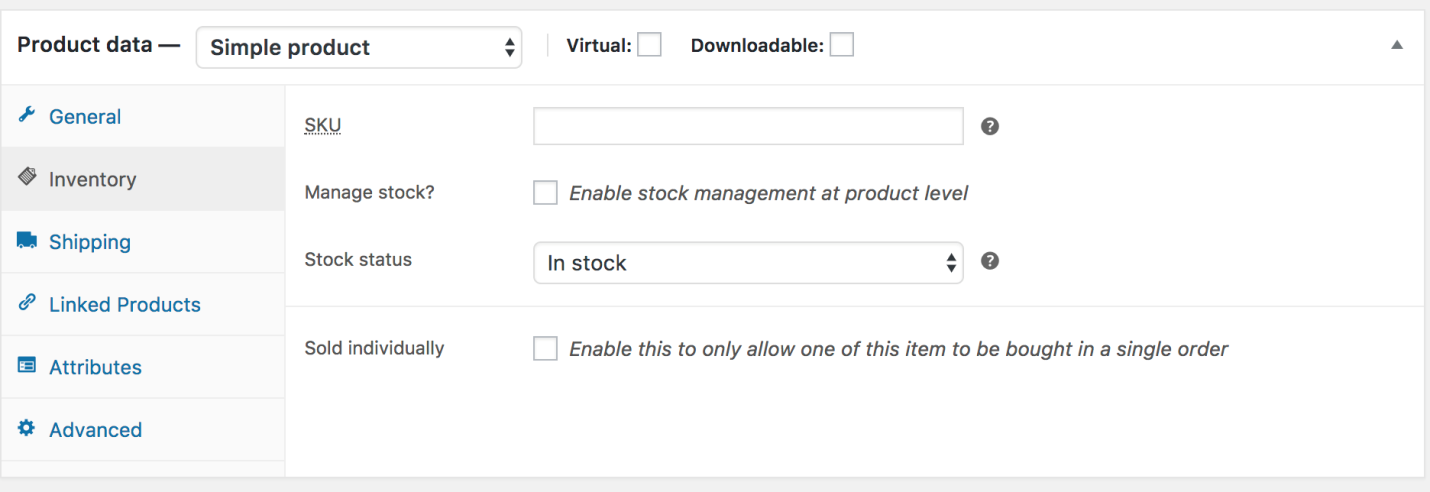
Select stock quantity, backorder, or out of stock option in the Stock status box. Enter a number in the low stock threshold option, select Allow or Do not Allow Backorders. Enable the Sold Individually and set a limit to provide the buyer with the limit of purchasing products.

Now visit the Shipping section, and set the weight, height, length, and width of the product. Provide the shipping classes to specify the shipping methods.
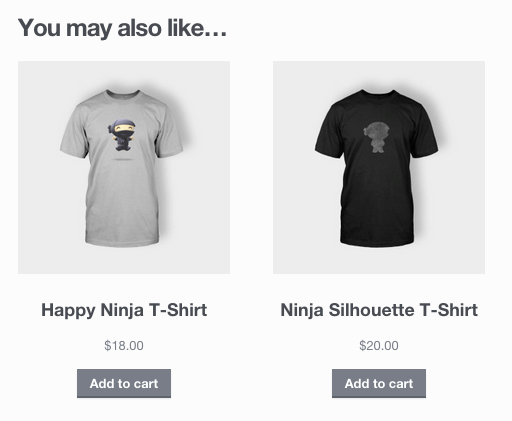
Now comes the strategic part, Linked Products Section. Here you will promote further products with cross-sells and up-sells option. Choose a particular product in the dropdown list or select a group of products if you’re offering a combo. This helps to sell more items as customers love shopping bundled deals.
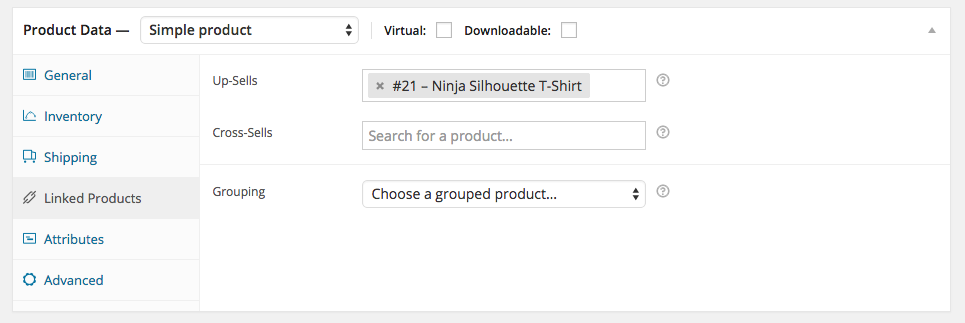
But don’t forget that in both Cross-sells and Up-sells option, if you want to encourage the user to upgrade their choices, you’ll only select the related products to be displayed on the detail page. For example, if you’re selling jeans, then you can offer them a T-shirt on the same page or jogger pants.
Assign details on the items in the Attributes section. You can also select Custom Product Attribute.
In the advanced section, you get the option to enter optional purchase notes, menu orders, and reviews. You can enable/disable these options anytime based on your personal choice.
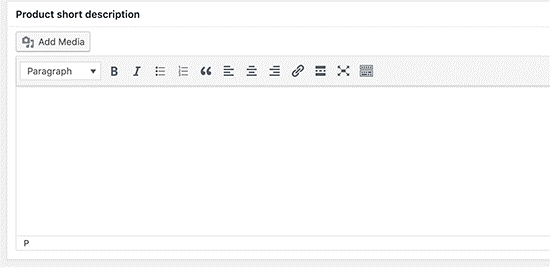
In the “Product Short Description” section, you’ll be creating a catchy description to be used on your website and on various pages. However, you should use some interesting or attention-grabbing words to attract buyers.
In the end, click on the Publish option. But don’t forget to review everything. Again whenever you launch a new product with a different category or same category, repeat the process, and that’s it.
Step 8: Best Templates and Themes to Create WooCommerce Website
Your website template or theme must be visually appealing and attractive. It must have everything that grabs customer’s attention, sustains their retention level, and improve the conversions.
Similarly, if you don’t want to use the Recommended Theme by WooCommerce, you can also think about further options. That’s why we’ve listed below some of the best themes that you can use for your WooCommerce website. Your theme should illustrate your website thoroughly.
Check out these highly-optimized, mobile-friendly, and widely used themes.
Ocean WP – A brilliant way to customize your website, best for WooCommerce users.
Astra – It is easy to use this theme that comes with built-in templates and provides WooCommerce support. You can also use the ready-made websites by Astra with a single click.
Shop – This is useful if you want to run campaigns because you can build multiple and attractive landing pages. This theme provides WooCommerce users fully customized options to choose from.
Step 9: How to choose the WooCommerce theme
It’s the most valuable point that you must bear in mind before choosing the best theme or creating a visually appealing look for your WooCommerce website.
However, most beginners strive to decorate their website with lots of attractive features without knowing that it can quickly reduce their website loading speed. Thus, it is a bad idea to load your website with too much stuff which is not required for your website. Your WooCommerce website must be well-optimized and user-friendly. You need to follow the below points.
Simple design – All the above theme options provides most of the features you need for your website. If you want a highly-decorated website, you can use those options. But it’ll lead to slow website performance and customers needs to wait for a few seconds while your website is loading. Customers often switch to a different site if the online store is taking too long to open. That’s why make sure that the design is clean and simple. It’ll also enhance the readability so that you could enjoy high conversion.
Mobile friendly – Don’t forget that maximum internet users shop online using their mobile phones. Therefore, you can take the help of website developers to make your website mobile friendly. However, if you’re using the above themes, then contacting the developer is also not essential. Just keep the design simple and check out the mobile view of your through the preview option.
Check reviews and ratings – Before downloading and using any theme or template, don’t forget to check out the reviews. This ensures that the theme you’re using is good for your website or not.
All these are essential steps that you should never overlook. Also make sure not to copy the style of any existing website. After all, your website will be describing your brand, so choose an iconic and distinct theme so that the buyers can easily recognize your online store.
WooCommerce Settings and Options for Management
This is the final part of our detailed tutorial, where we will explain what all settings you can access. So let’s start.
Orders
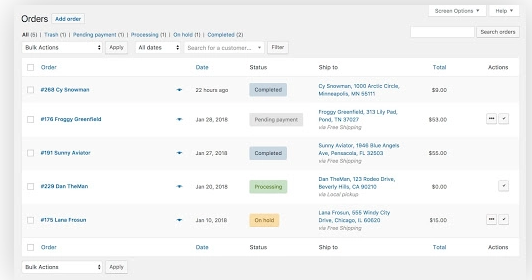
This menu will display the order status at your online store. In case you are dealing with only digital products, you can see the type and the number of items sold.
However, there may be several statuses in the case of physical goods, like pending payment, canceled transaction, refund, etc. You can have a look at each situation and change shipping address or billing, change the delivery date or review the refunded orders. You can also use custom order status plugins for WooCommerce to manage your store in a better way.
Reports
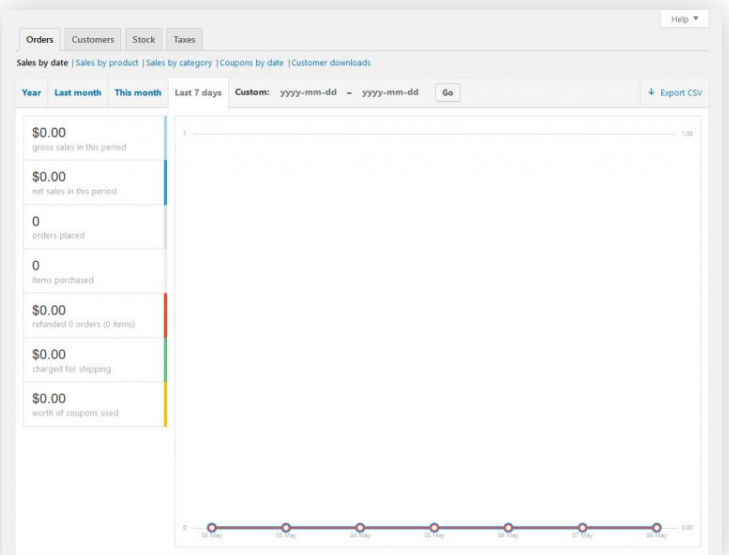
In the reports section, you can find detailed insights about each thing present on your online store.
This may include monthly, weekly, yearly, or your desired time frame’s net and gross sales. You can even have a look at the coupons used, refunds issues, bought items, and orders taken. Apart from this, you can take a glance at the sales category, product-wise stocks, detailed customer info, and taxes.
Coupons
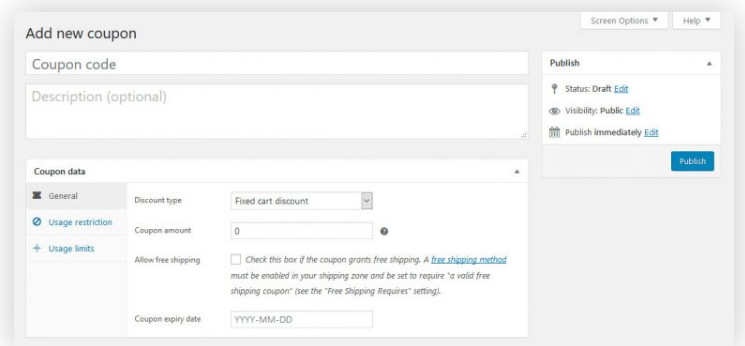
In this section, you can manage or create discount codes. Simply decide how much and what type of discount you are going to place, its restrictions in use, and the expiry date. You can also decide the number of coupons that can be accessed by one customer by placing the limits.
Settings
You can control your online store with this section. There are several configuration options which we will describe one by one here.
Tax
Standard rates: Here, you can decide the tax rates for your online store.
Zero rate rates: This will include the items that are free from tax.
Reduced rate rates: This applies to the items with reduced rates.
Tax options: You can decide whether you want to use gross or the net rates, add classes for taxation, configure tax totals and price display, and configure the calculation of shipping and product taxes.
Accounts and Privacy
Privacy policy: You can set up your privacy policy page. You can also link it to the checkout and registration pages, so that the users can read it easily.
Account options: You can set up the way users will purchase items from your store. It has options like how to create/remove the account, using personal data, etc.
Personal data retention: You can also determine the duration of retaining the customer’s personal information until the time it is deleted.
Shipping
Classes of shipping: Make classes of shipping that you can allot to the specific products.
Options: This may include options like whether you want the cart to display shipping costs or not, enable or disable the troubleshooting debug mode, and setting a default destination for shipping.
Zones: You can assign or define the various shipping zones.
Products
Inventory: Here, you can disable or hold on to the stock management option, decide the duration of holding unpaid orders, select notifications about low stock, and the stock displayed to users.
Reviews: With this option, you can control the ratings and reviews of your products and decide which users can leave the review of your store.
Downloadable products: With this option, you can put some restrictions on downloadable products.
Similarly, you can set the measurement and weight units with the measurements option.
Apart from these settings, you can control the email notifications to be sent to the customers, customize the email templates given by WooCommerce, and enable some advanced settings too.
Extensions
You can access the WooCommerce store with the help of the add-on section. Category-wise orders are made. When you tap on any extension, it straight away diverts you to the website for buying something. You can also manage and see your recent subscriptions at the top.
Status
You can have an overview of your online store’s performance with this menu. WooCommerce support is also available when you want to download the report for your use.
Conclusion: Create WooCommerce Website from Scratch
You should definitely create WooCommerce website for your business because it is the best platform to build an e-commerce site to increase sales and grow your business. The plugin has lots of power-packed features and has all the tools that you require to set up a great online store.
In this guide, we have explained how to create WooCommerce website from scratch, setting up products, and managing your store in various aspects. So, go ahead and showcase the best of your online business with WooCommerce.