
WooCommerce has tons of features for customizing online shops conveniently. You can add products, coupons, and more with just a few clicks. But when it comes to customizing emails, you will find that most of the available designs are pretty basic. There is a lack of visually appealing elements. However, there are ways to customize WooCommerce emails that can delight the customers and reflect your brand’s identity effectively. In this post, you will find all the details.
Why should you customize WooCommerce emails?
The main reason that comes to mind for customizing WooCommerce emails is branding. If you send the same generic emails all the time, your brand’s personality will never be able to captivate the customers. As a result, the store’s identity will be forgotten in the sea of similarity.
That’s why it’s important to customize the WooCommerce email effectively to reflect your brand’s personality and identity. It will strengthen the relationship between your business and the customers. Also, by customizing and making the WooCommerce email visually appealing, you will have a higher chance of achieving high conversions and engagements.
How to Customize WooCommerce Emails:
There are various ways to customize emails on WooCommerce. In this post, we will discuss two methods:
- Customize Email Using the Default WooCommerce Settings
- Customize WooCommerce Emails Using the Emailor Plugin
- Customize WooCommerce Email Using the Email Customizer for WooCommerce Plugin
- Customize WooCommerce Email Using the Decorator Plugin
- Customize WooCommerce Email Using the Drag and Drop Email Customizer by Flycart Plugin
Let’s take a look at them.
Customize Emails Using the Default WooCommerce Settings
If you need to make simple changes to your email templates, you can use the default WooCommerce settings. It enables you to add basic elements such as footer text and the header image. You can customize your email by following these steps:
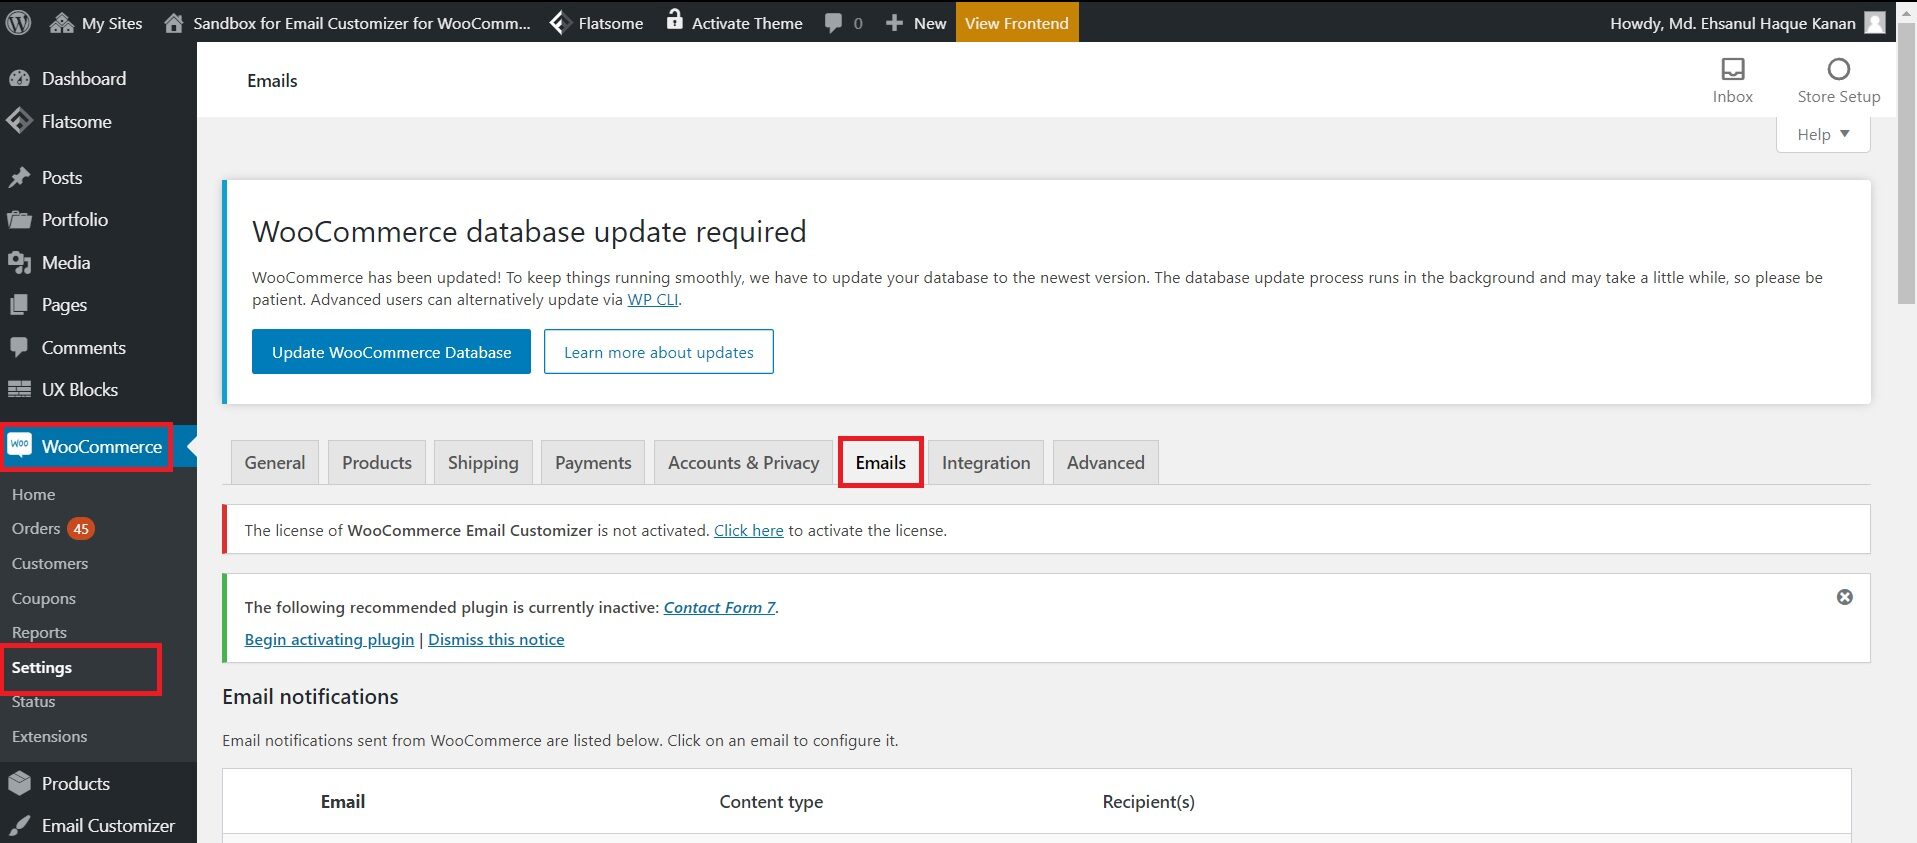
- Head to WooCommerce > Settings > Emails.
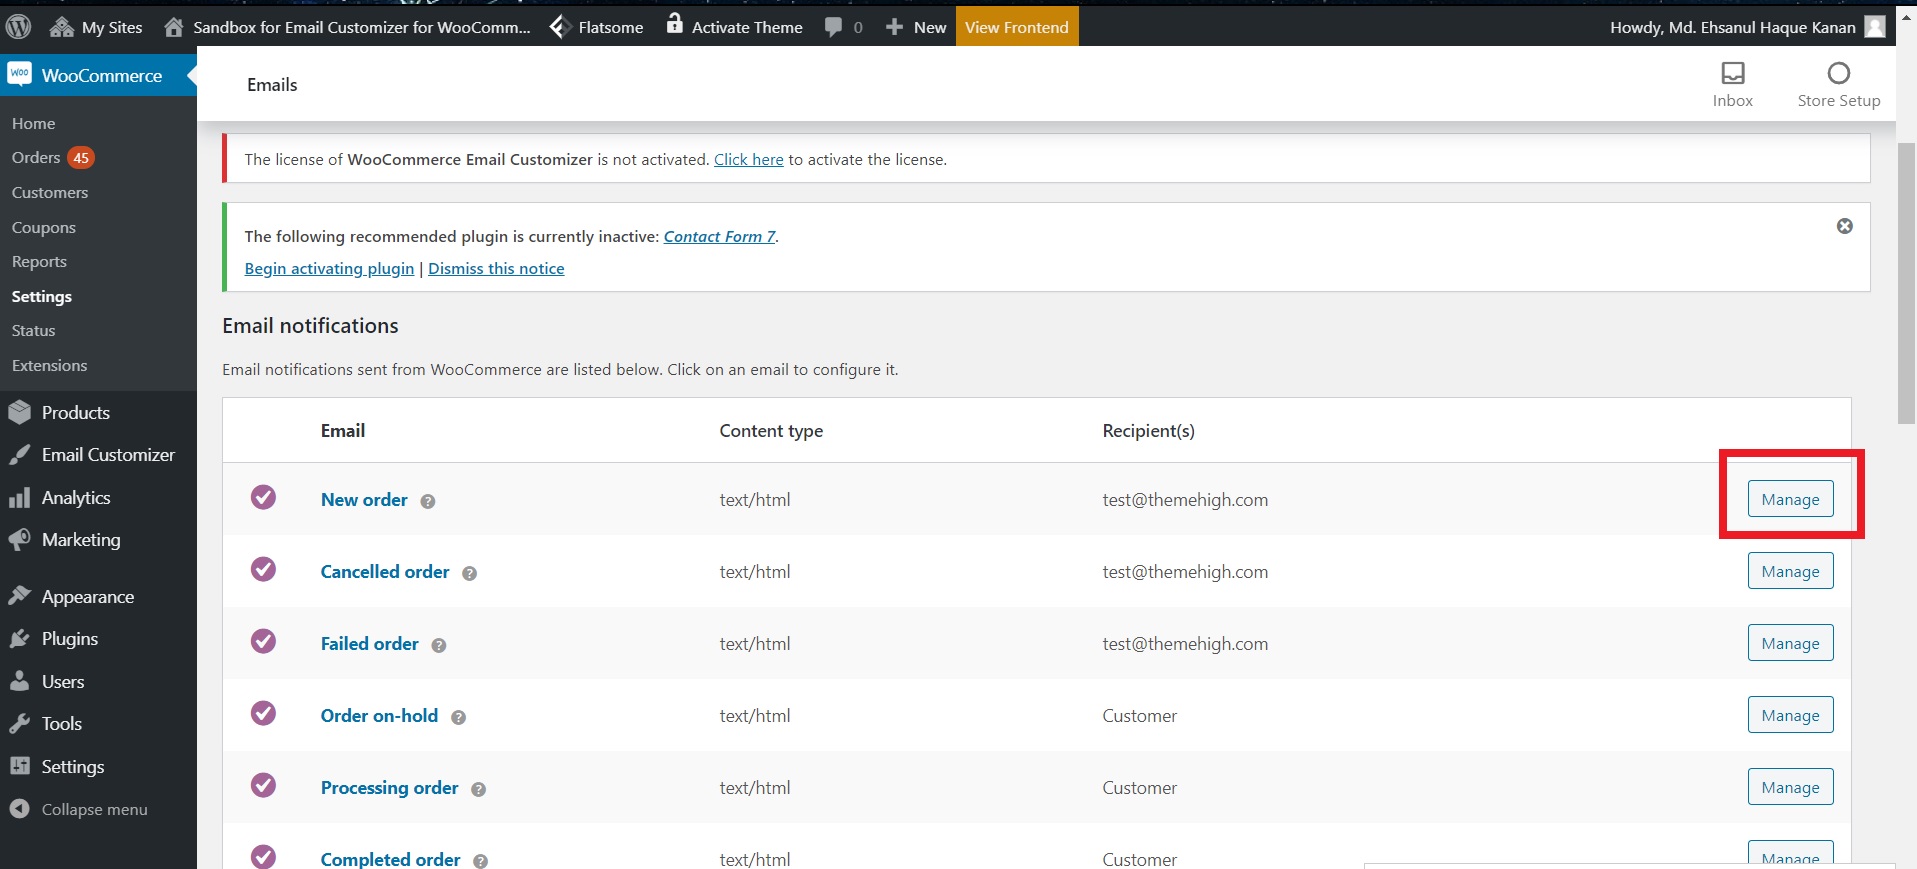
- You will see all types of WooCommerce emails. Click on the Manage button of the email that you want to edit.
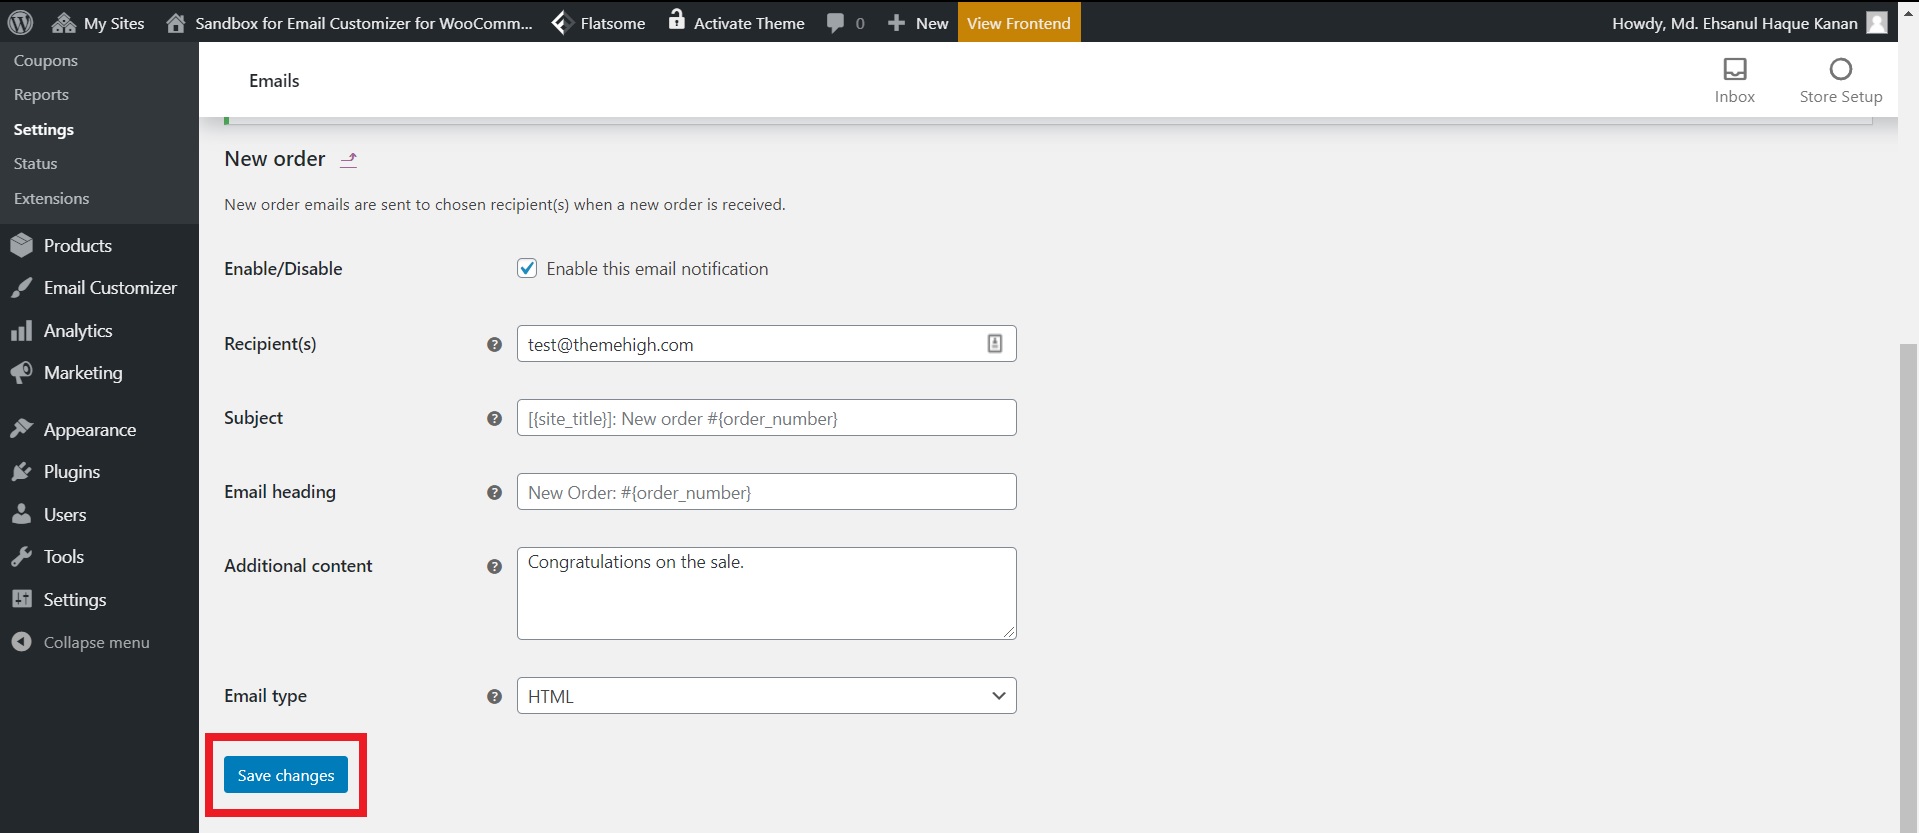
- A new page will appear. Here, you can modify the subject, email heading, and recipient. Also, you can change the email type and add additional content. Besides, there is an option for enabling or disabling the specific email.
- Finally, click the Save changes button.
That’s how you customize email using the default WooCommerce settings. However, the options of default WooCommerce settings are not as powerful as the email customizer plugins. Nonetheless, it’s an easy way to get started with.
Customize WooCommerce Emails Using the Emailor Plugin
Emailor is an amazing plugin. It allows you to customize WooCommerce emails by simply dragging and dropping elements onto the template. There is no need to write a single line of code.
You can customize the WooCommerce emails with Emailor by following these steps:
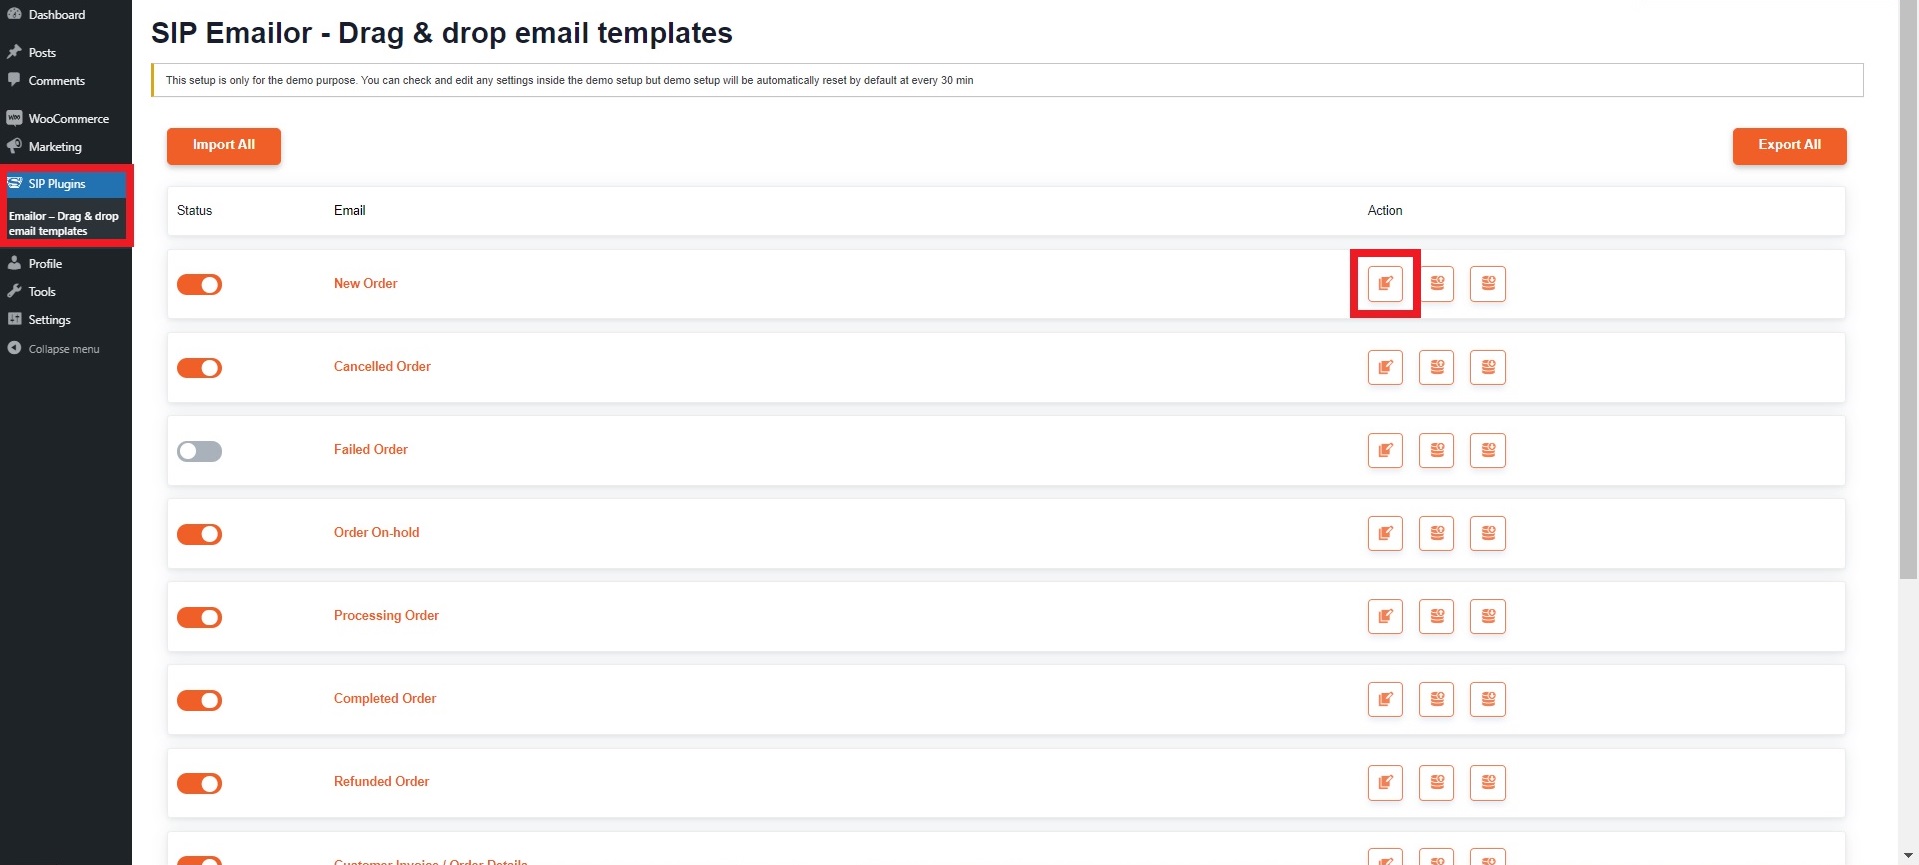
- Head to SIP Plugins > Emailor – Drag and Drop Editor.
- Click the Edit icon of the email template that you want to customize.
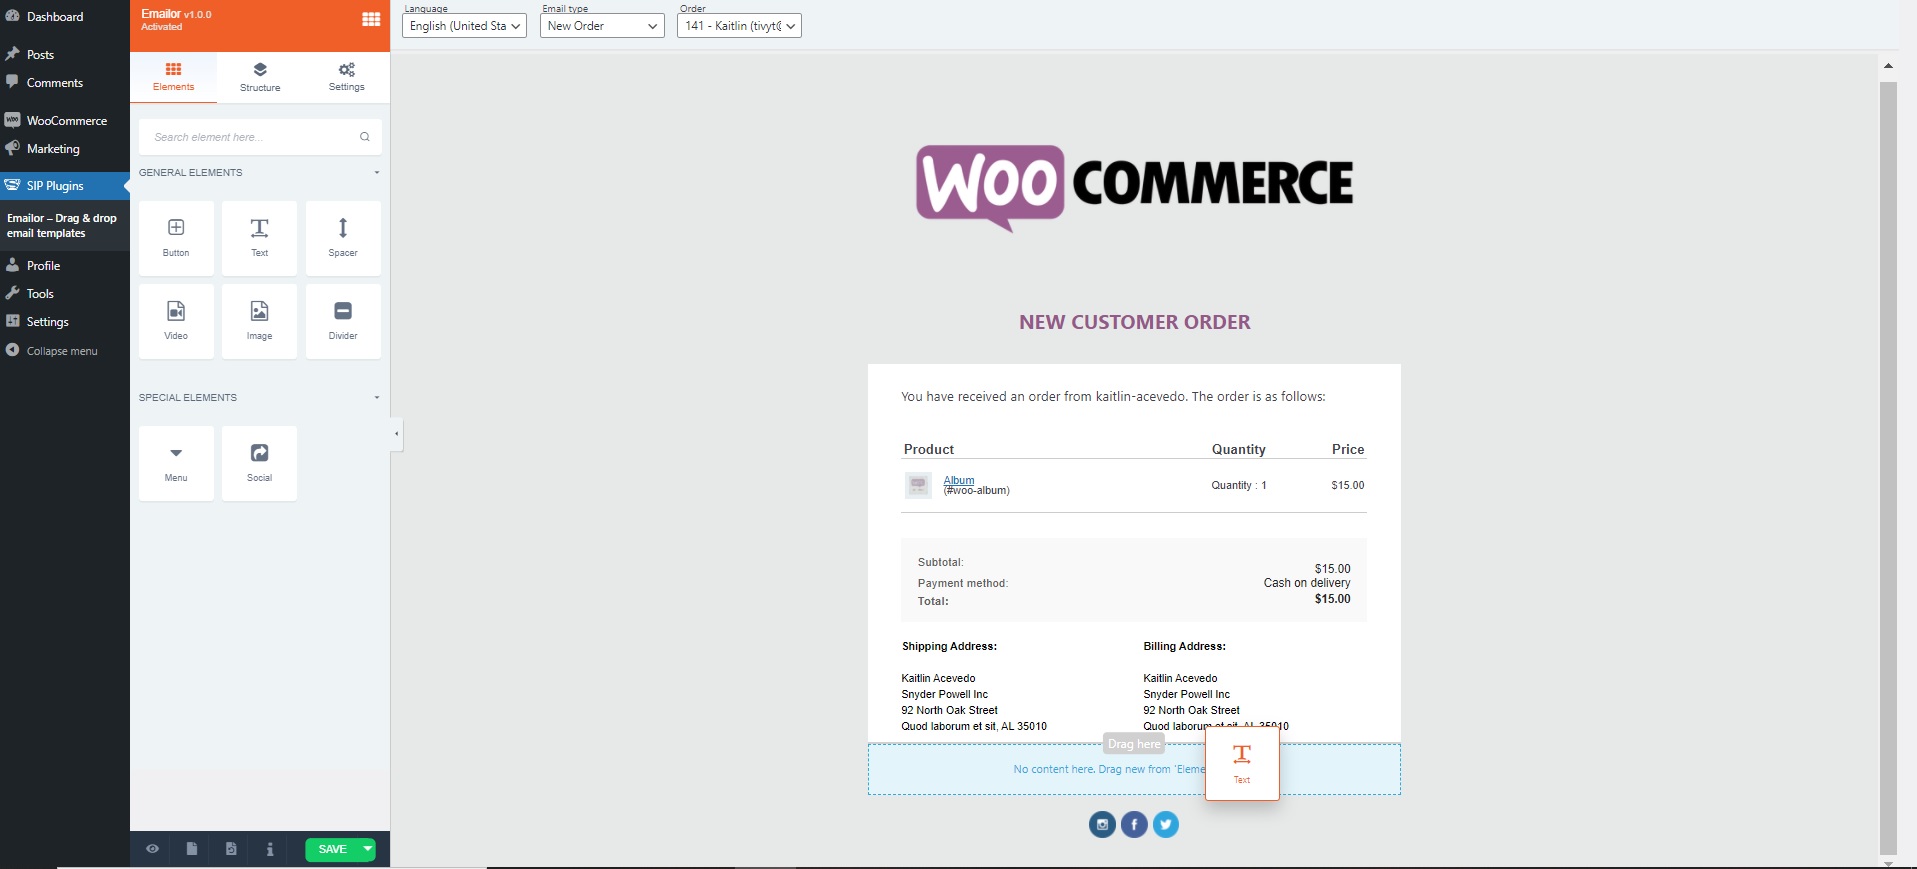
- Now, simply drag and drop your preferred element onto the template.
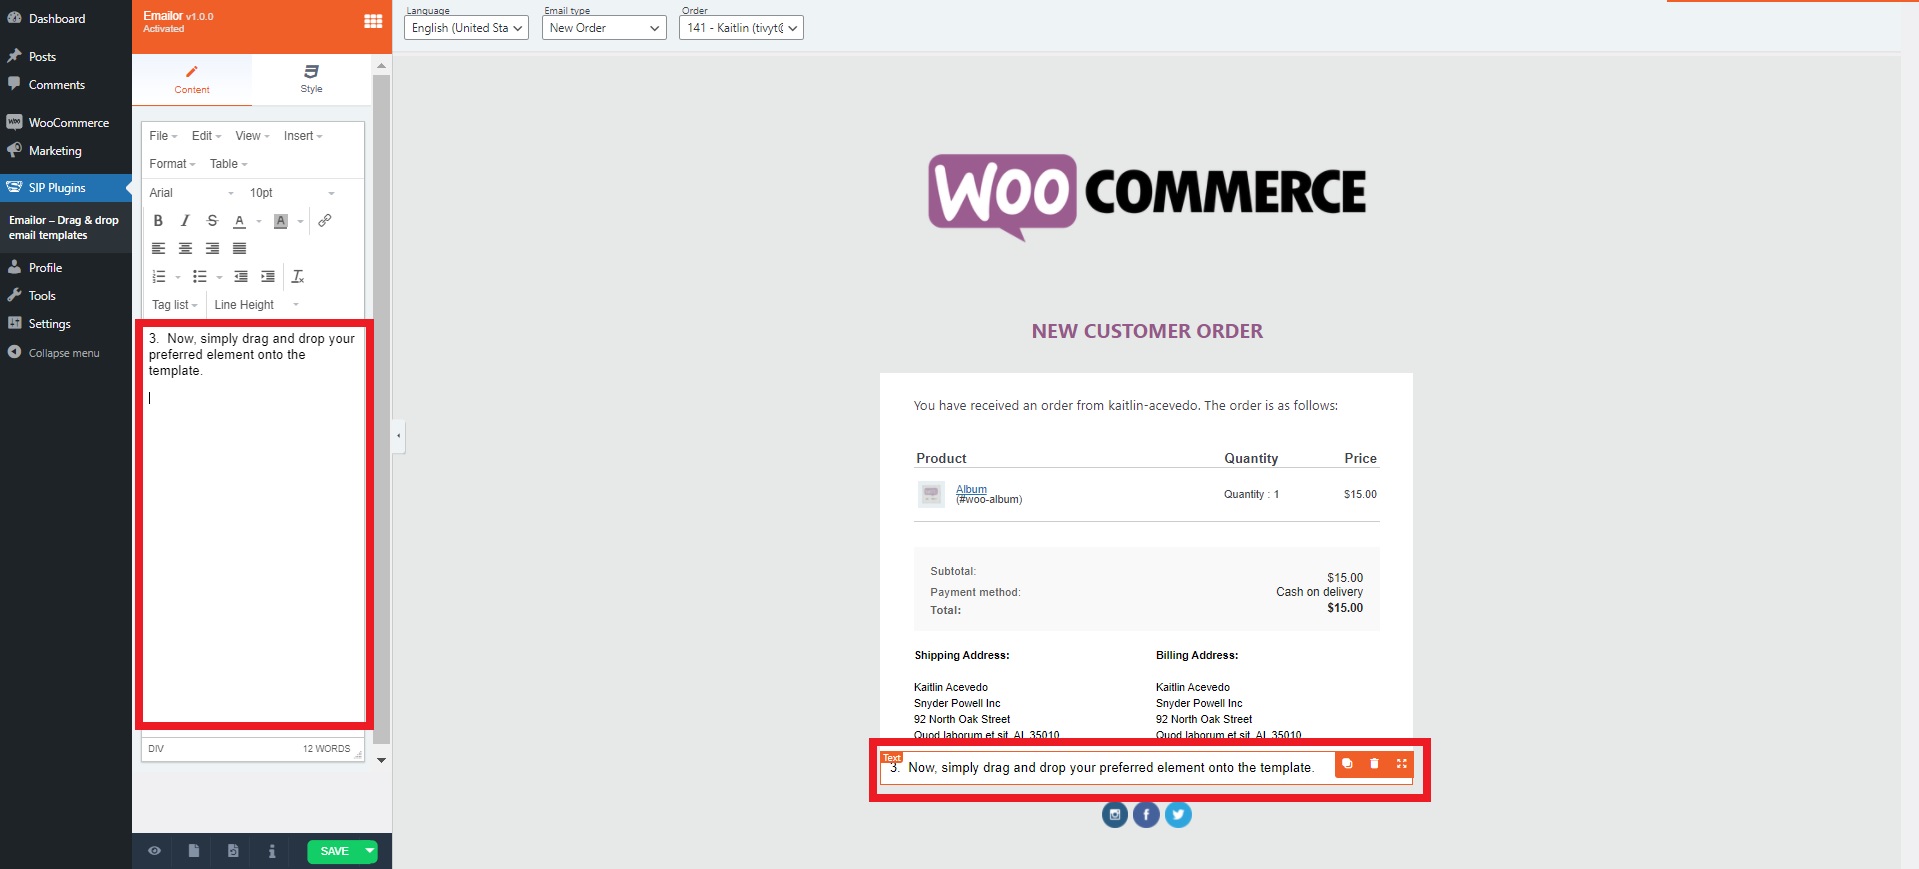
- You can customize the added element by double-clicking. Then you can change the text from the menu.
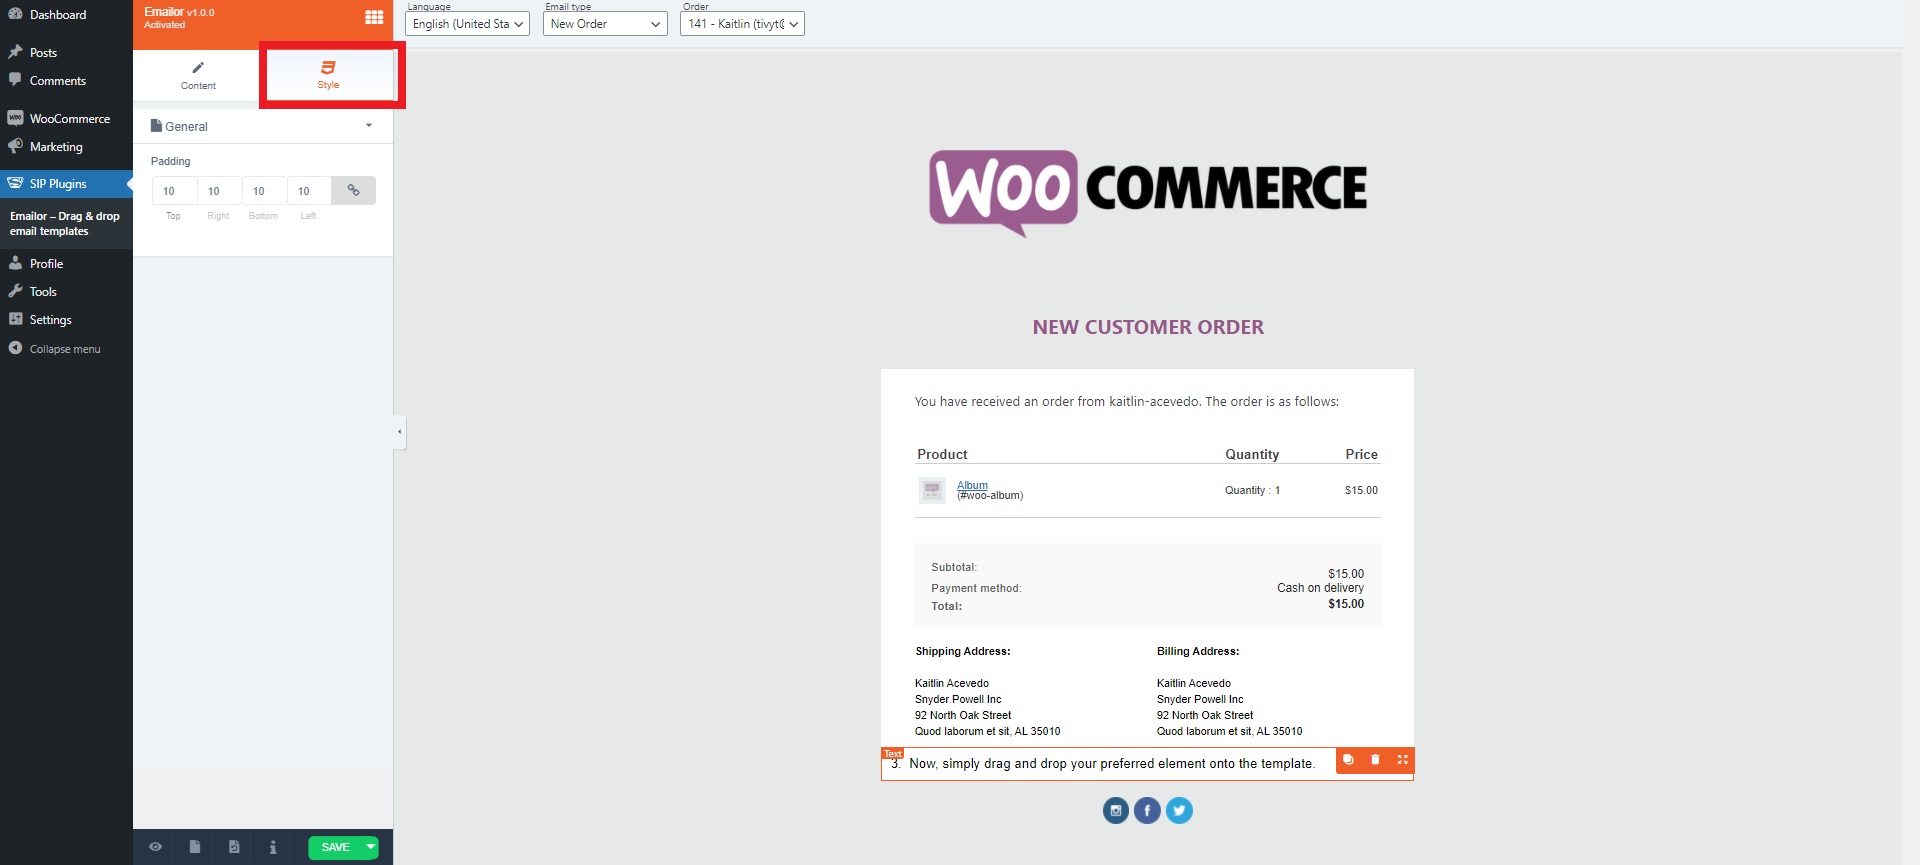
- Also, you can apply different styles by clicking on Style.
That’s how you customize WooCommerce emails with Emailor by simply dragging and dropping email elements. You can get the plugin for only $29/year.
Customize WooCommerce Emails Using the Email Customizer for WooCommerce Plugin
With the Email Customizer for WooCommerce plugin, you can create and customize visually appealing email templates for WooCommerce emails. Apart from basic elements, it allows you to add WooCommerce elements, including billing and shipping details, to the emails conveniently. It supports the live preview feature to give an instant view of the changes that you are making.
To customize email using the Email Customizer for WooCommerce plugin, you have to follow these steps:
- Install the plugin.
- Once the plugin is activated, it will appear on the WordPress menu on the left sidebar. Head to Email Customizer > Templates.
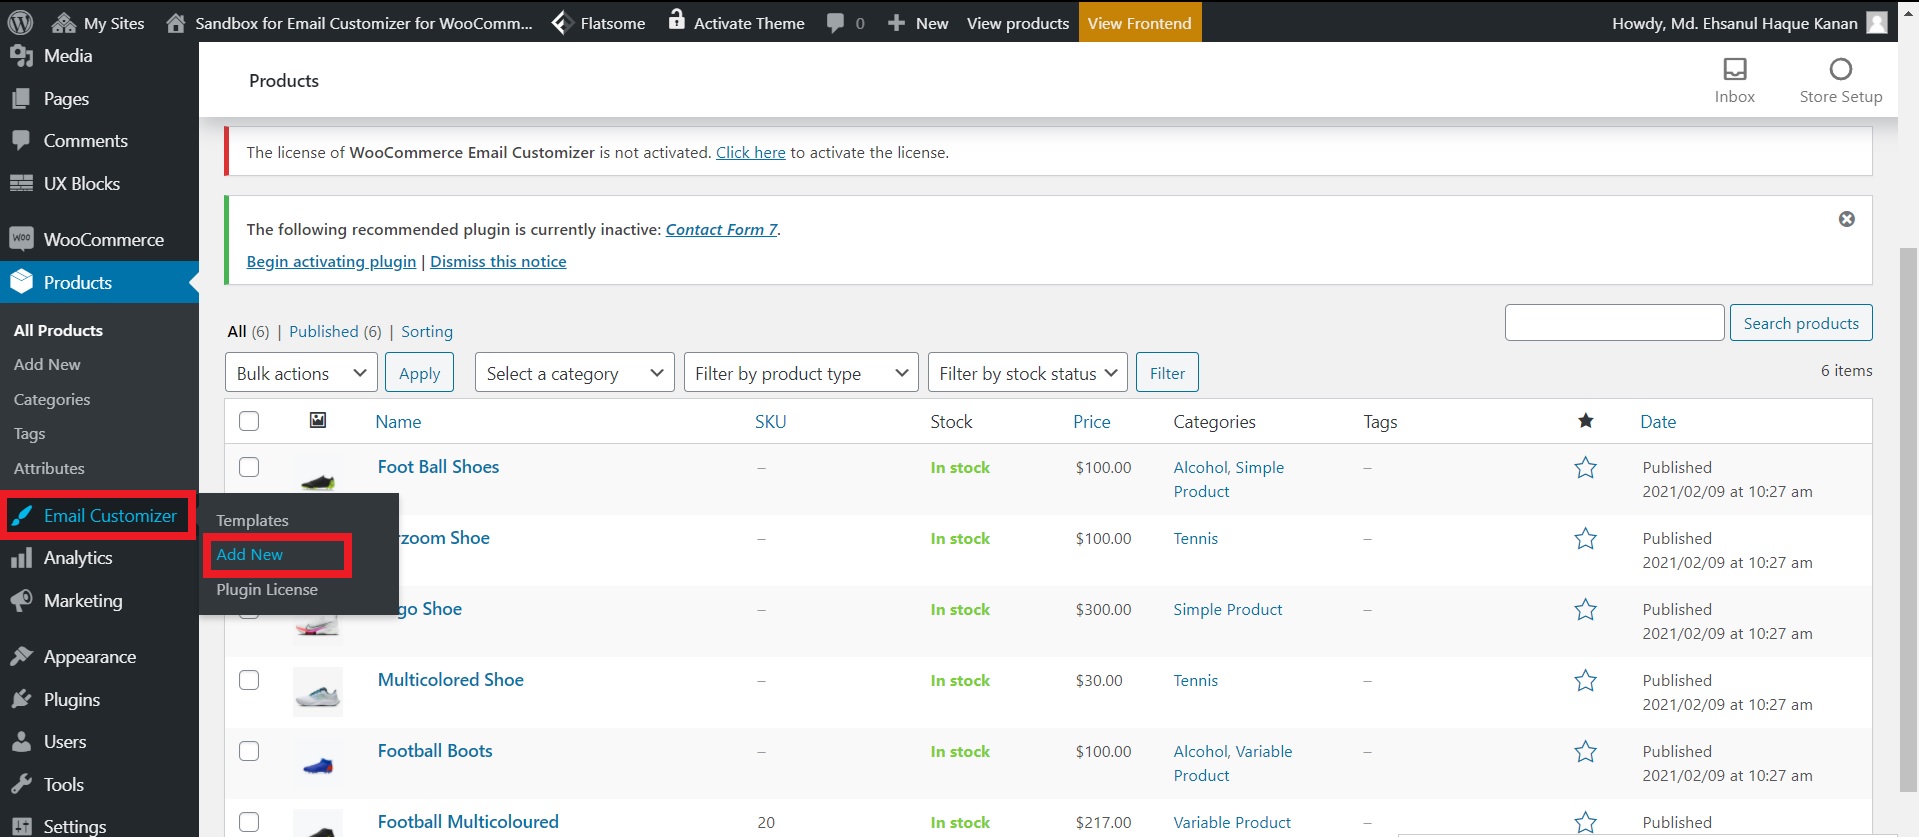
- You will see all the templates here. Click Edit under the email template that you want to customize.

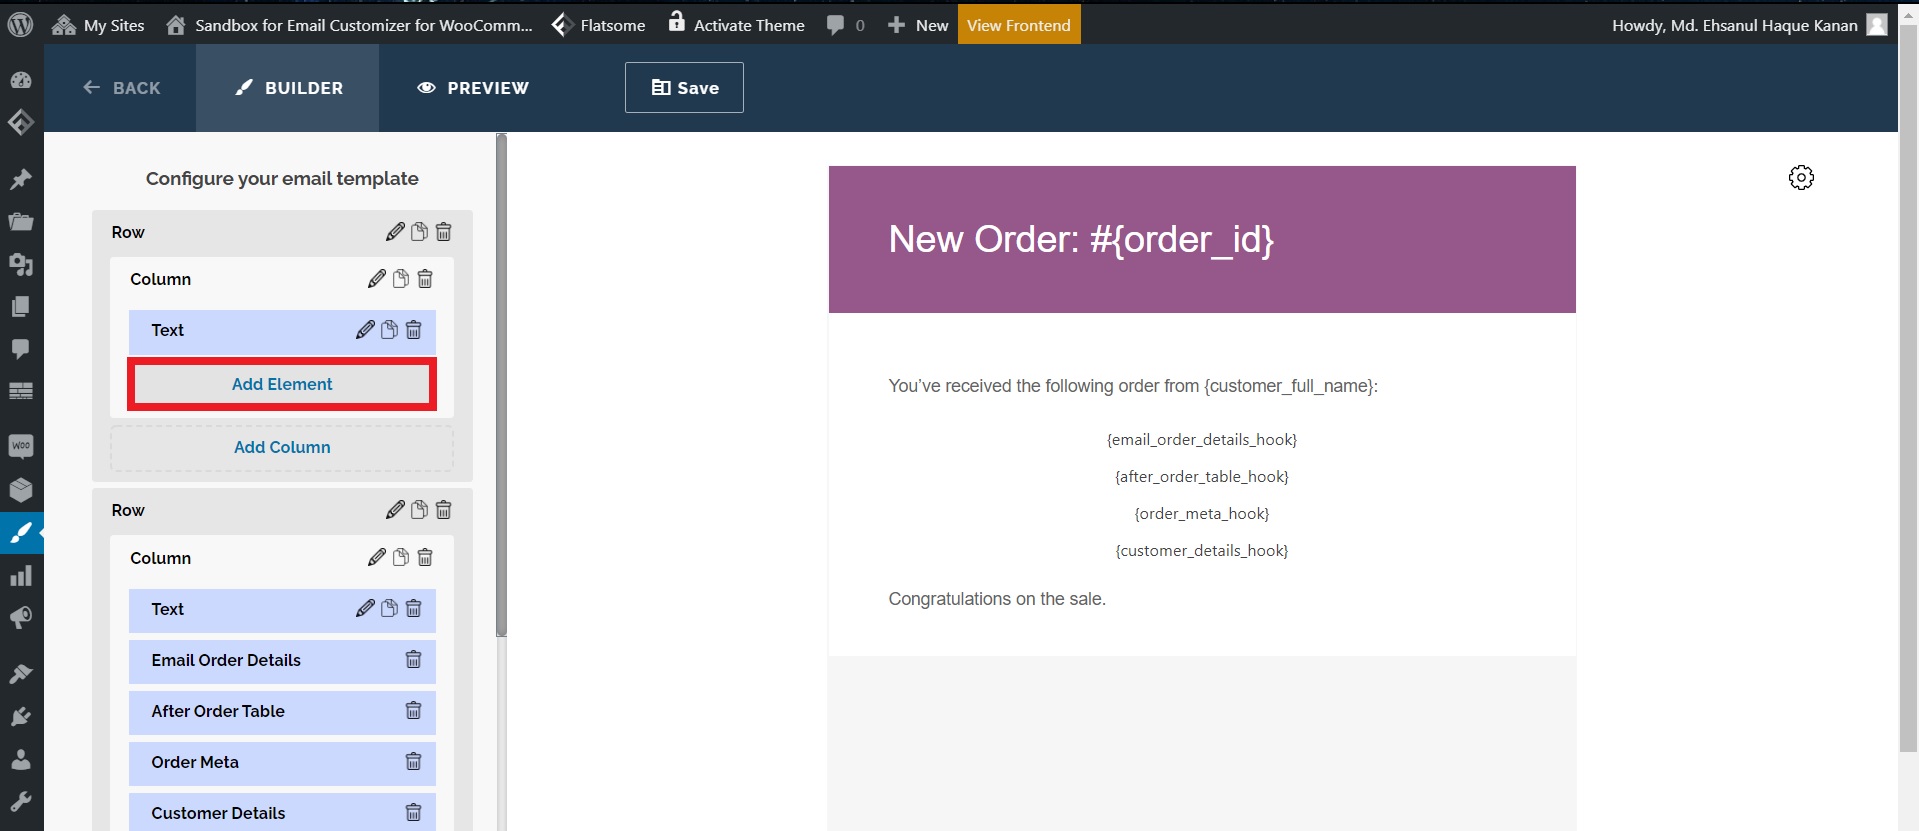
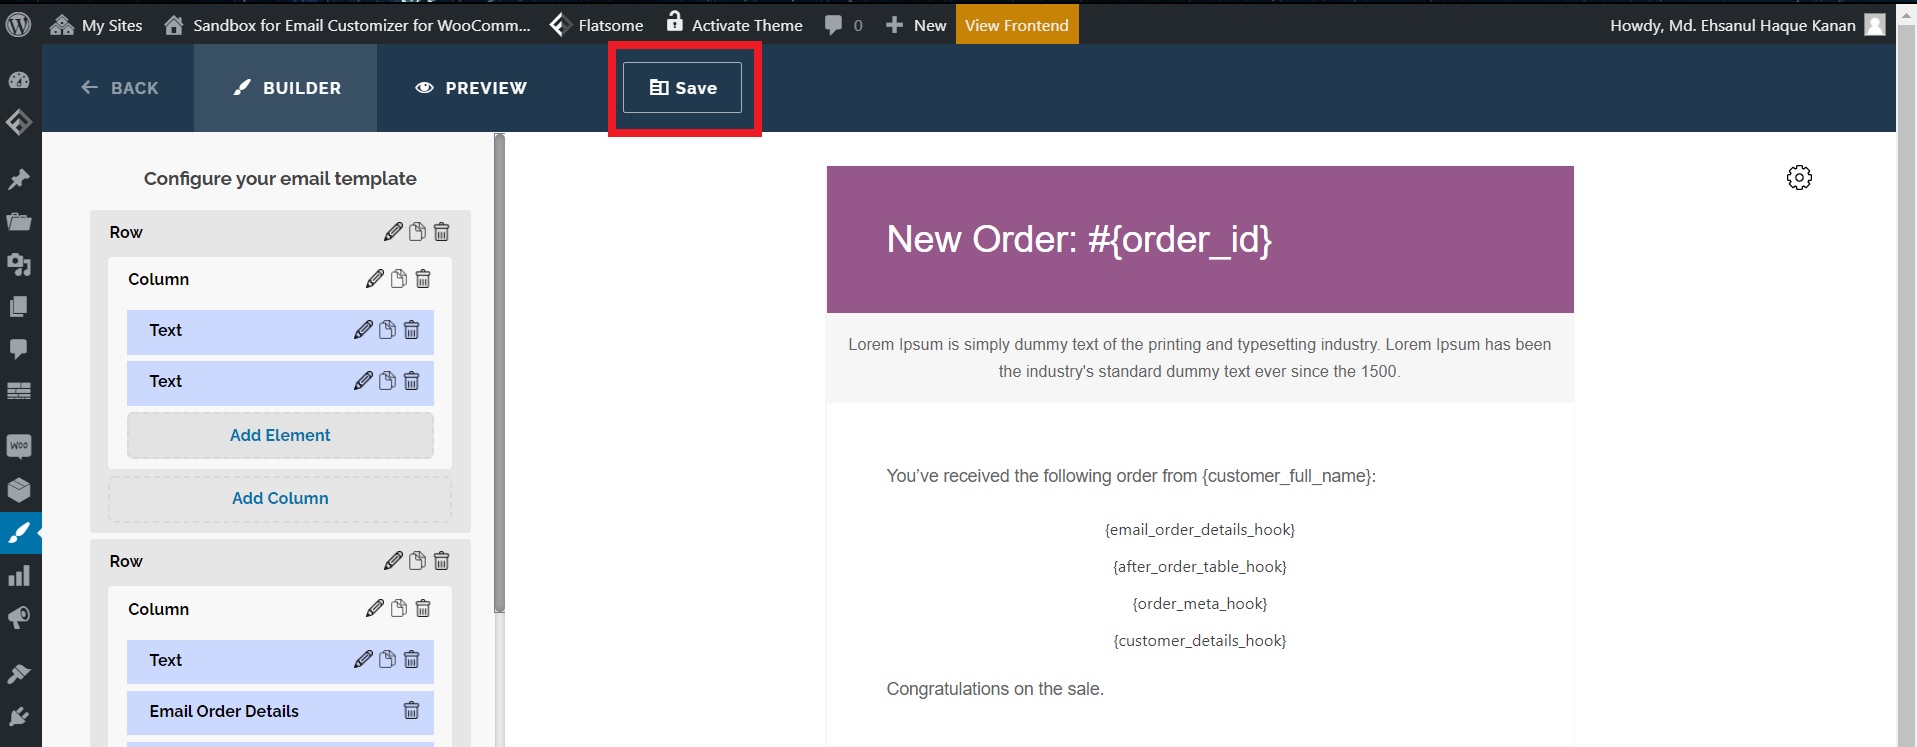
- The template builder will show up. To add new elements, click on the Add Elements button.
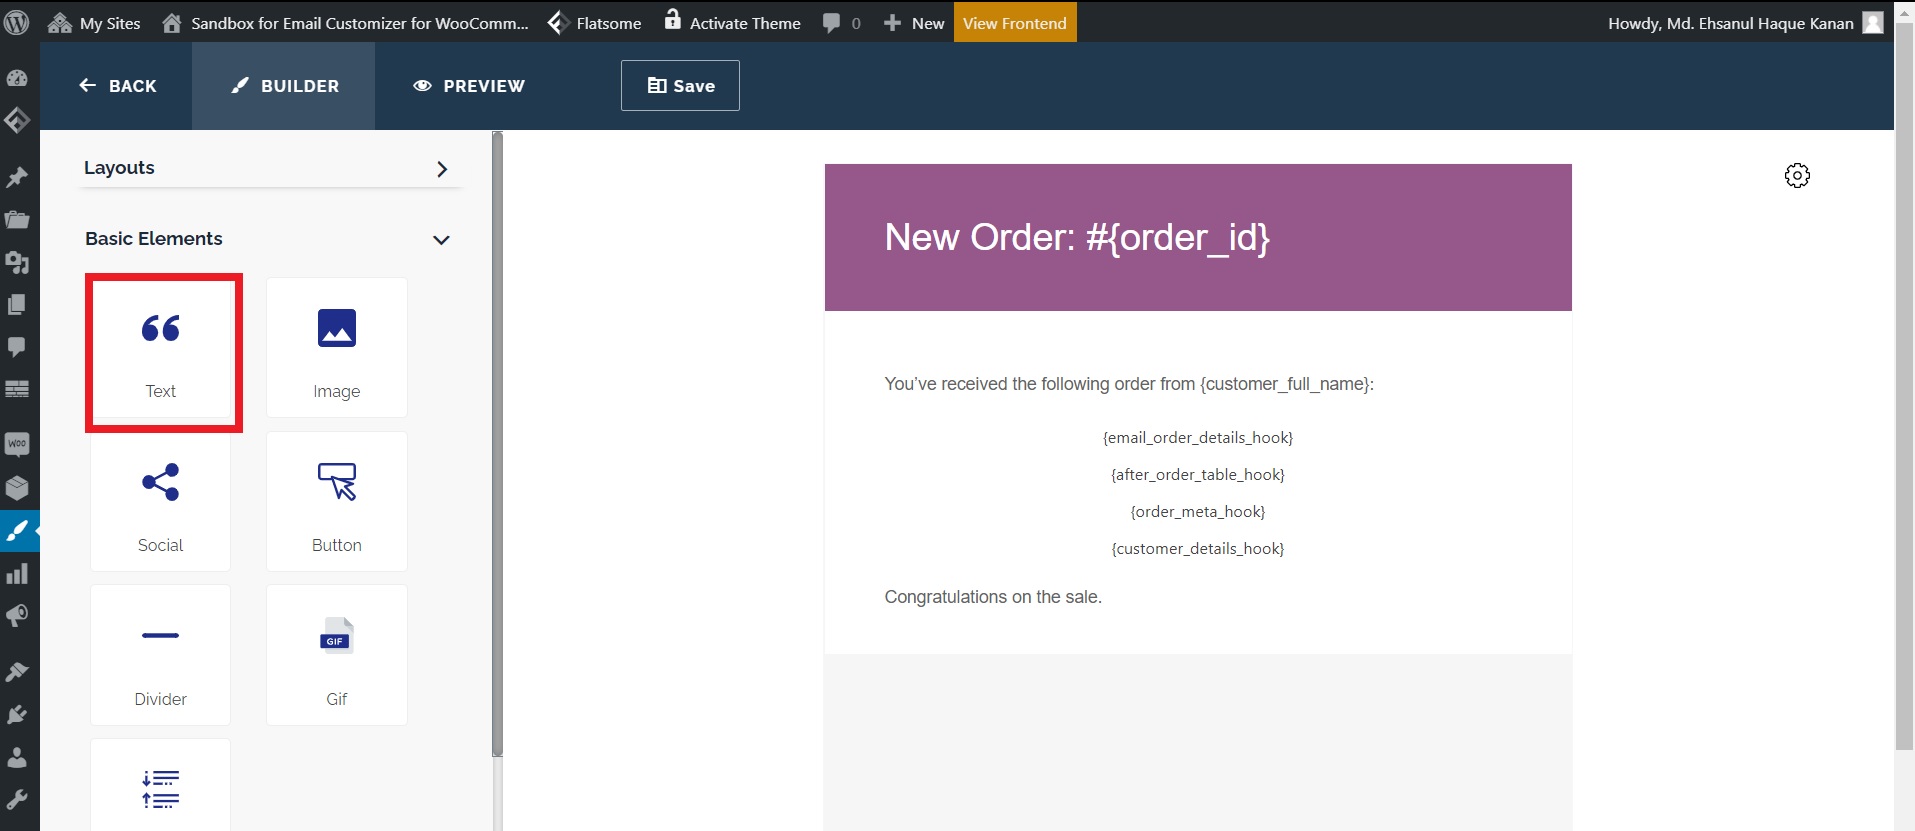
- Select the element type. In this case, we will choose Text.
- Now, you will find that the text element has been added to the email template.
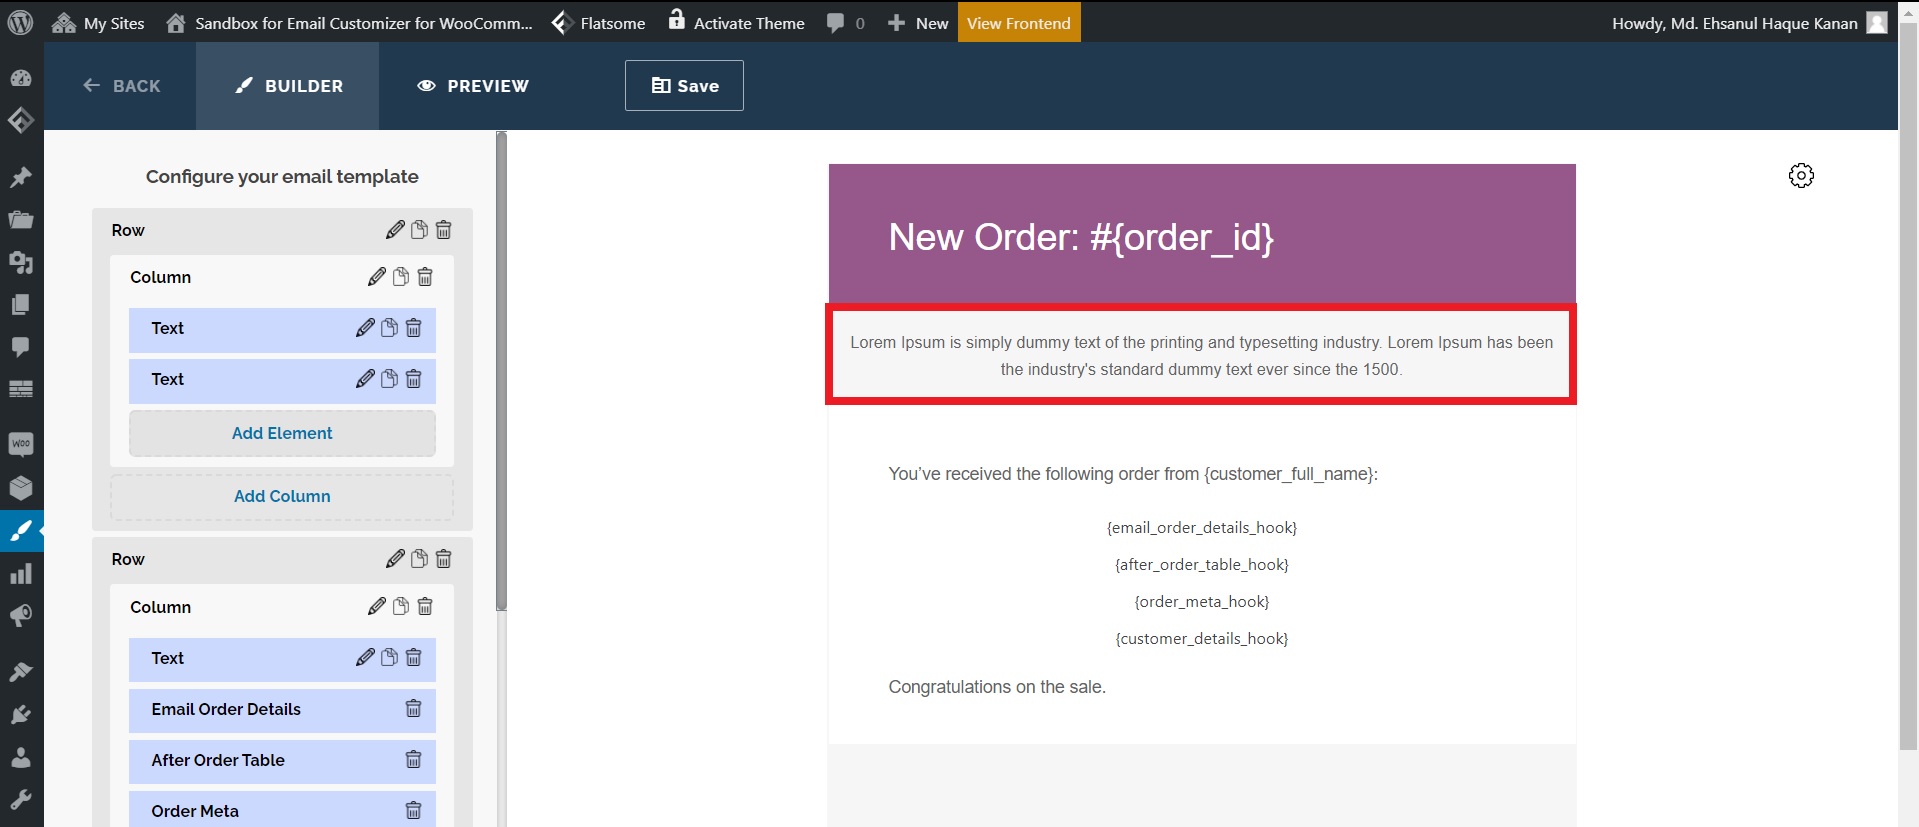
- Finally, click the Save button.
That’s it! Now, you can customize any email with the necessary elements easily with the Email Customizer for WooCommerce plugin.
Customize WooCommerce Email Using the Decorator Plugin
Decorator is a simple plugin. It enables you to customize all the elements of the email using sliders and color picker. You don’t have to write any code. Simply follow these steps:
- Install the Decorator plugin.
- Go to WooCommerce > Settings > Emails.
- Scroll down to find the Decorator Click the Open Decorator button.

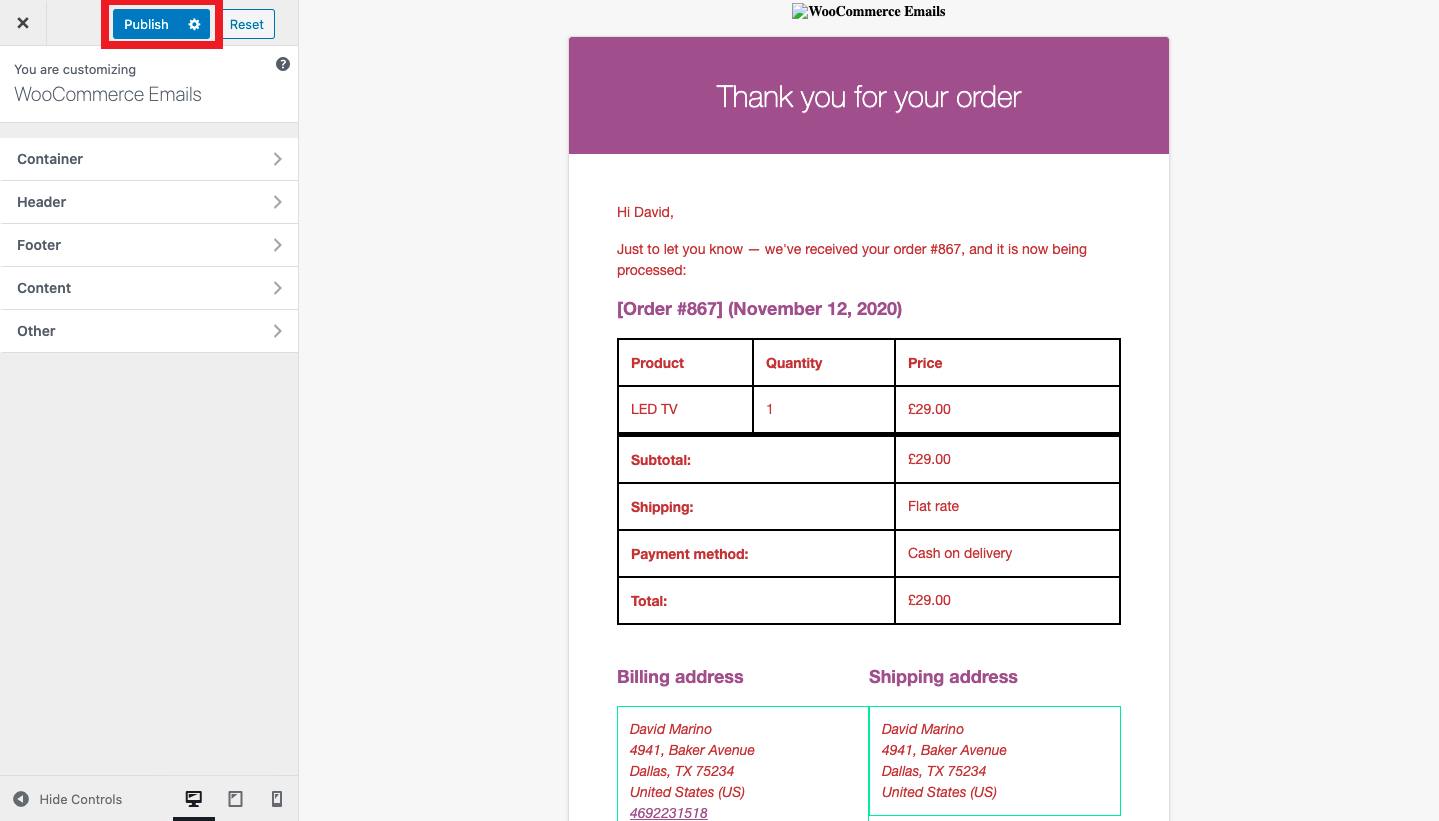
- The decorator panel will show up. Here, you can edit container, header, footer, content and headings of the email. Also, you can apply different styles and add custom images.
- Once you are done with the customization, click the Publish button.
Decorator has live preview option that helps you to visualize any changes that you make instantly. Also, the plugin is open-source. So, you can use it for free.
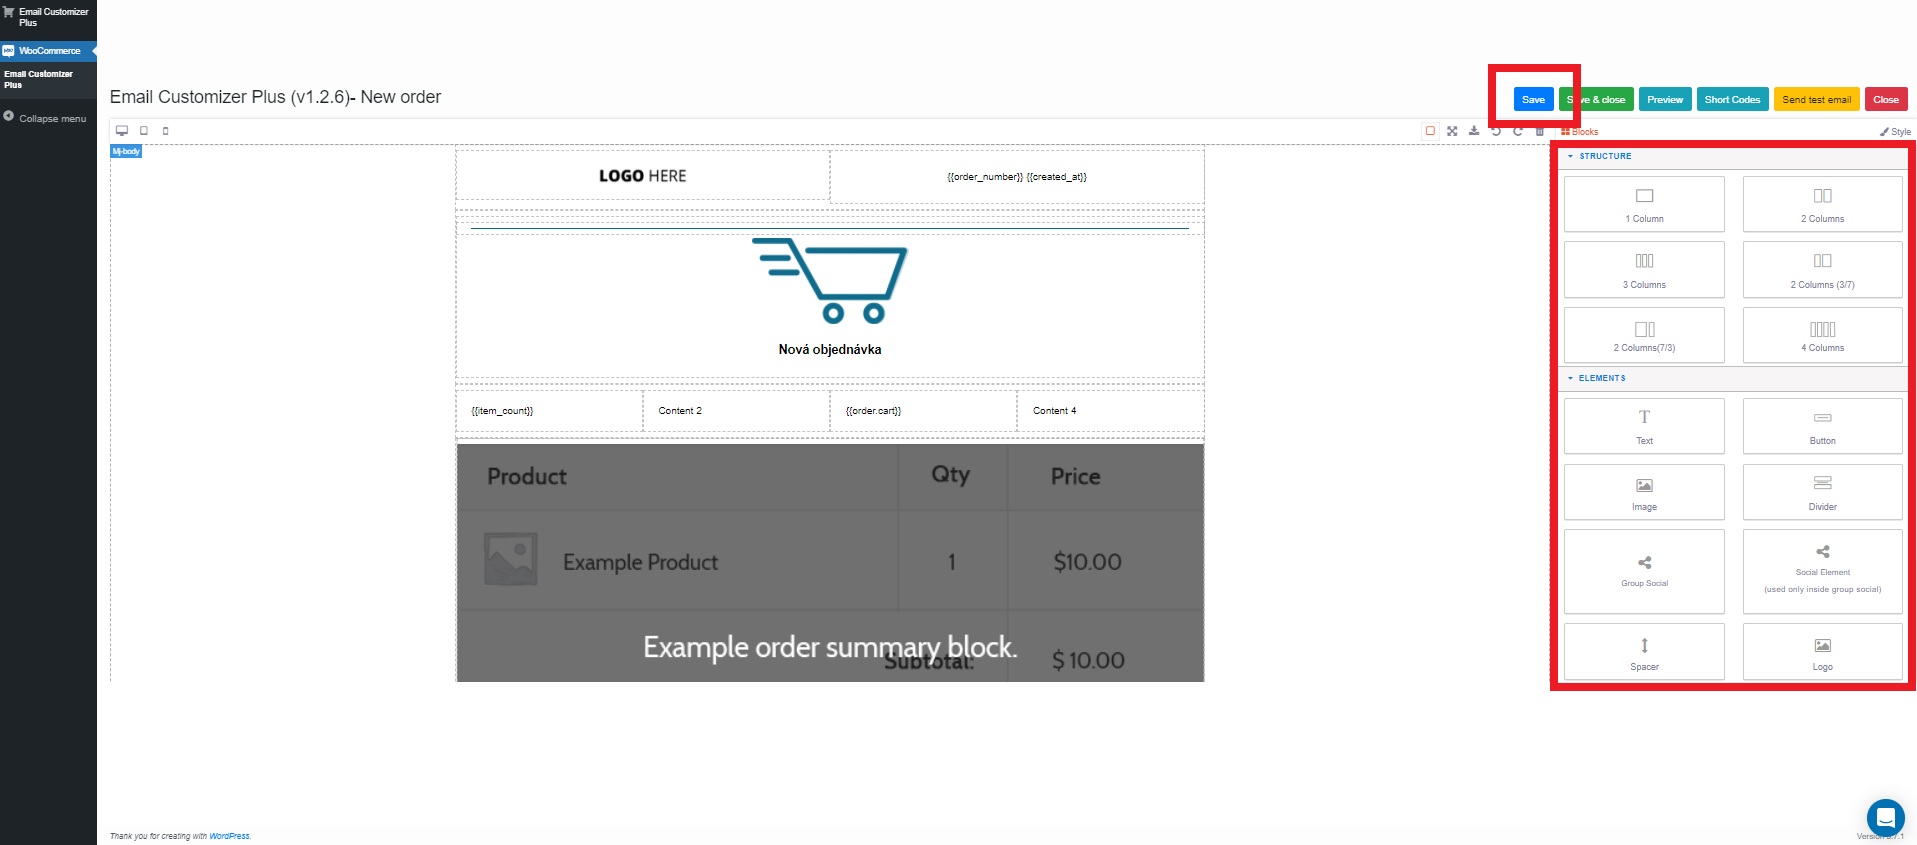
Customize WooCommerce Email Using the Drag and Drop Email Customizer by Flycart Plugin
Flycart’s Email Customizer plugin enables you to create and customize professional looking emails for your WooCommerce store. Most other plugins focus on making minor changes, like editing headers and footers. However, Flycart’s Email Customizer allows you to make major changes to the default WooCommerce emails. For instance, you can easily add editable text box and social icons by simply dragging them onto the email template. Here are the steps:
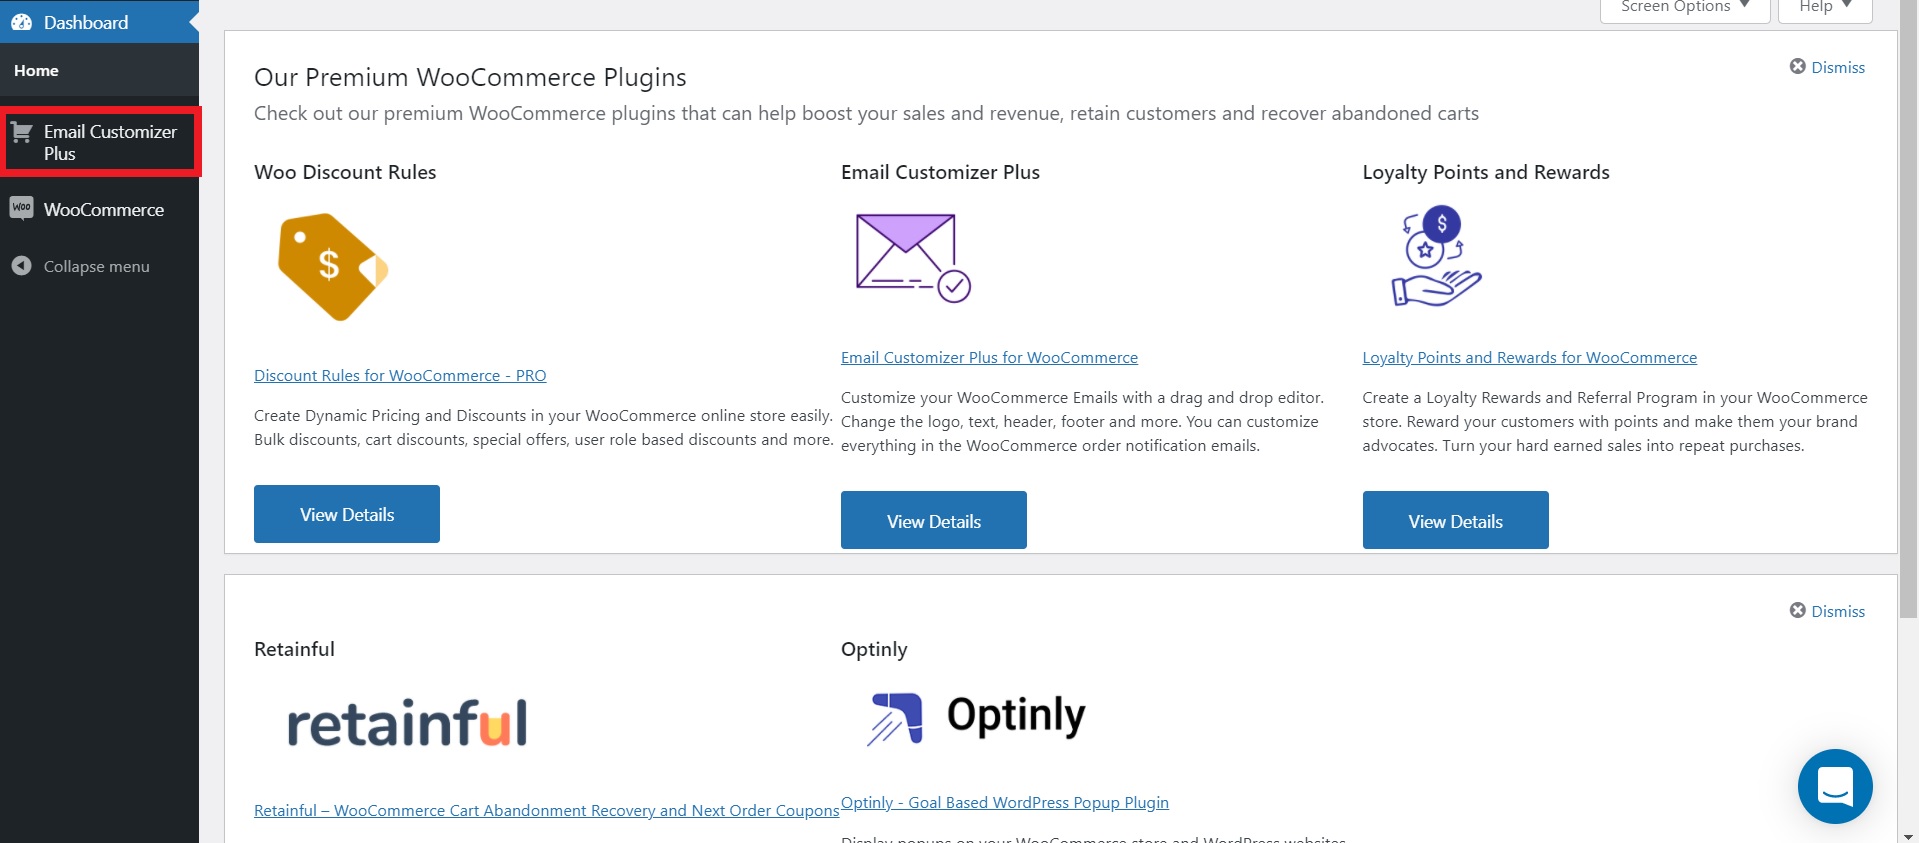
- Click Email Customizer Plus.
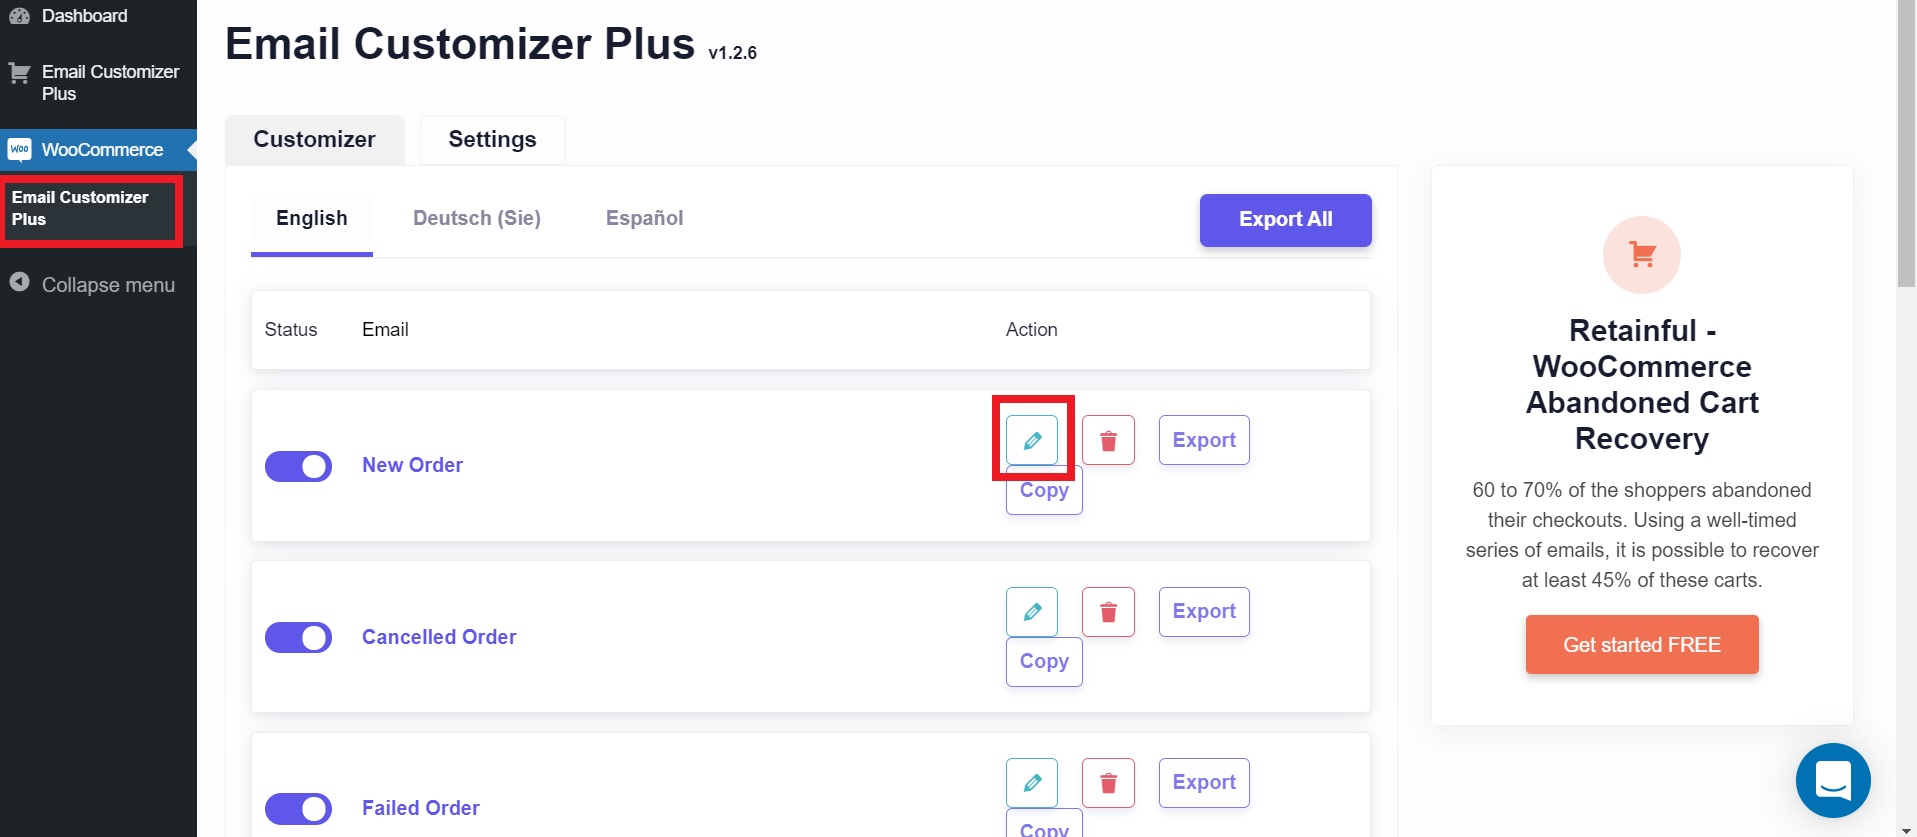
- Click the edit icon.
- Drag the elements on the left onto the template. You can add logo, editable text box, social icons and more components. Also, you can change the structure of the email by adding columns.
- Once you are done, click the Save button.
That’s how you customize WooCommerce emails using Flycart’s Email Customizer plugin.
Wrapping Up
By following the methods mentioned in the post, you can easily inject your brand’s identity into the emails of your WooCommerce shop. Using the default WooCommerce settings is the easiest way for making simple changes. However, if you want to make advanced changes conveniently, we recommend you to use the Email Customizer for WooCommerce plugin. It can make your life a lot easier.